
Wild Clay Process
(Scroll to the bottom for the TL;DR version)
In the summer of 2020, my husband Kalevi was using an excavator to make a dugout (water pond) for our cows, and a chunk of yellow clay fell out of the side of the hole. He decided to bring it home for me and it started me on a 2 year journey to discover what this clay wanted to be.
I didn’t think I was ready to start messing around with wild clay - I had only been doing pottery for a year and a half, and I had so much to learn with my “store-bought” clay. But, I couldn’t help my curiosity and started experimenting with it right away.
First, I tested the clay straight out of the ground: I rolled a ball in my hands and squished it, and it didn’t crack very much along the edges. Then I made a ‘snake’ and bent it, and it didn’t break. These two tests tell you about the clay’s plasticity - basically, how flexible/workable it is - and this clay passed the test well enough.
To begin the next tests, I made a few little discs with it. It is a shiny yellow colour when it’s wet, and dries to a sort of greyish taupe colour. I marked the discs with “K” for Kalevi, and the temperature I was going to fire them at. I put one disc in my regular cone 04 bisque firing and it came out bright orange, very similar to my commercial clay. At this stage it was still very porous so I knew it needed to be fired hotter.

My first experiments with Saskatchewan wild clay
Then, I put another similar disc in my regular cone 6 firing. It didn’t turn out so well. Thanks to advice from “The Wild Clay Club” , I had used little dishes made from my commercial clay in both of these test firings in case something like this would happen. The wild clay disc melted into a bubbly black blob at cone 6, and the little dish saved my kiln shelf from being ruined!

Results from a cone 6 test firing with Saskatchewan Wild Clay.
So, now I had some good information. My K Clay wanted to be fired somewhere between cone 04 and cone 6. However, at this point I didn’t feel that I had time to experiment with different temperatures, so I decided to make a bunch of magnets from the clay and fire them to cone 04. While it is still porous at this temperature, it is quite strong. I had a local friend make me a Saskatchewan-shaped cookie cutter with his 3D printer and created some interesting souvenirs for our lovely province!

Saskatchewan wild clay souvenir magnets for Camp Wolf Willow
Now, there was a little hiccup where we suddenly found ourselves moving to BC for my husband to take a job with a ranch there. I really, really didn’t want to leave Saskatchewan and was pretty heartbroken to be moving away from my family, my beautiful prairie skies, and our farm that we worked so hard on. Kalevi went back to the dugout to fill up some buckets with this clay, so that I could at least bring some of my province with me.
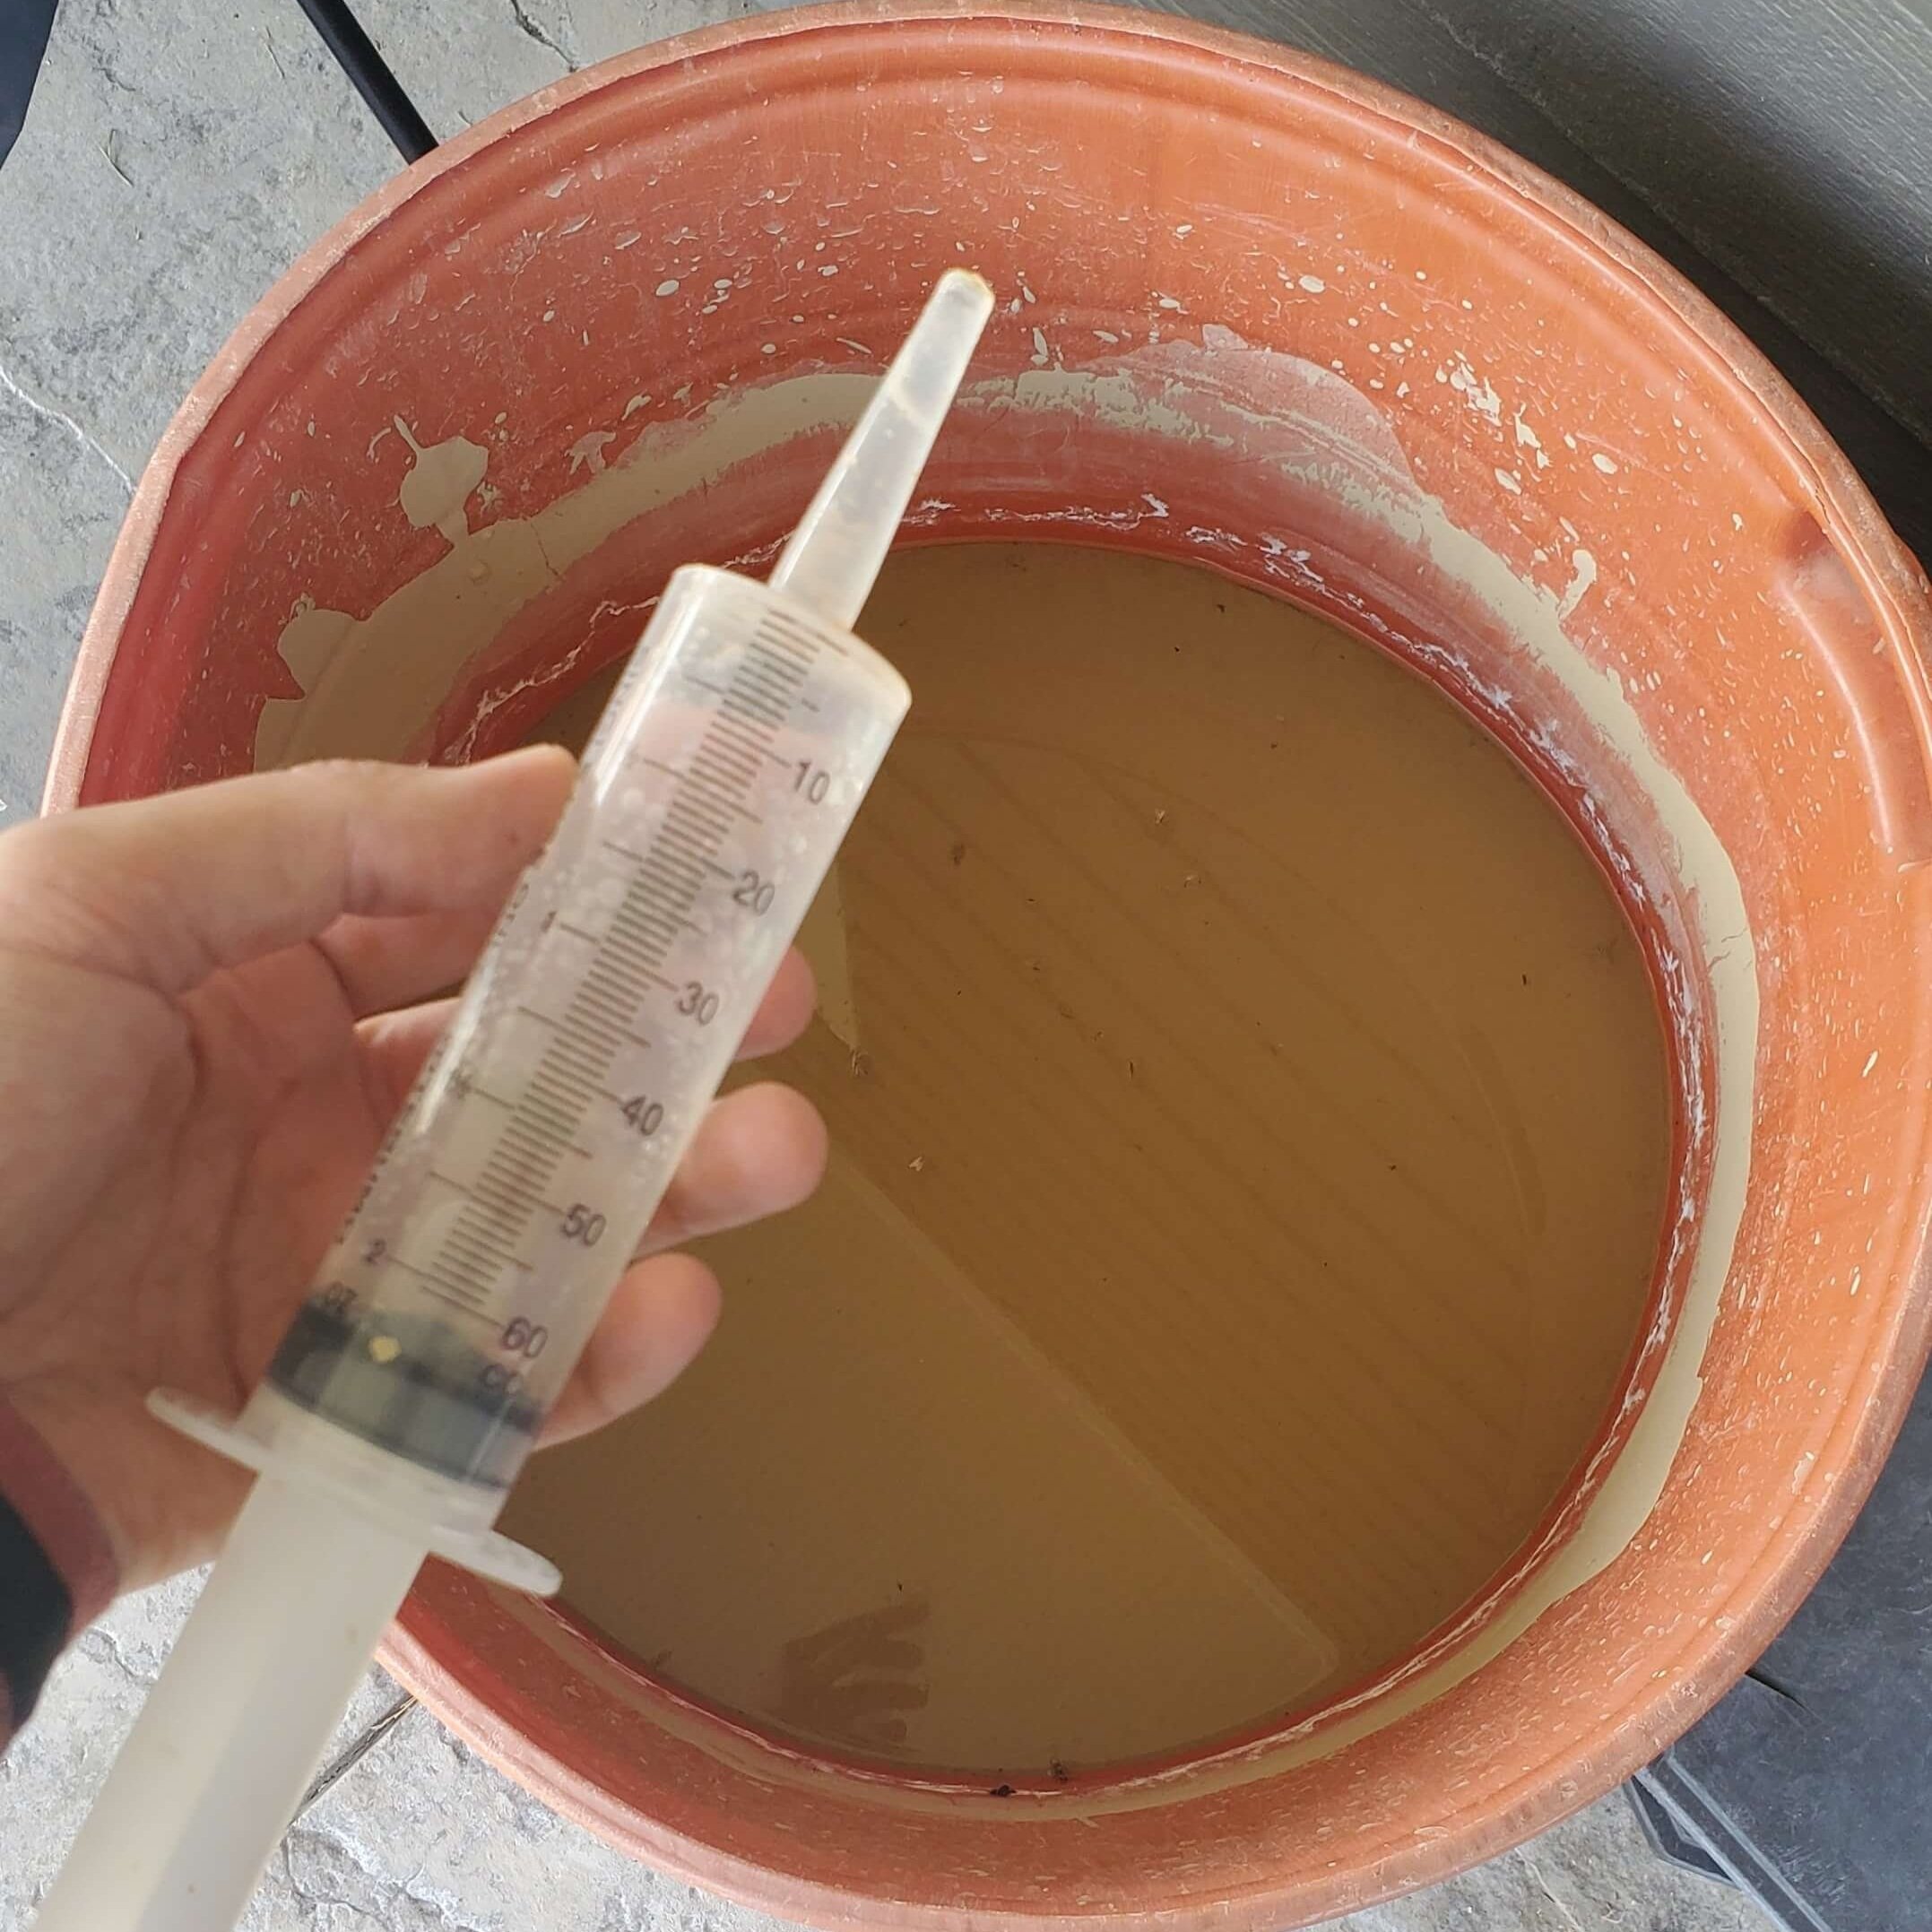
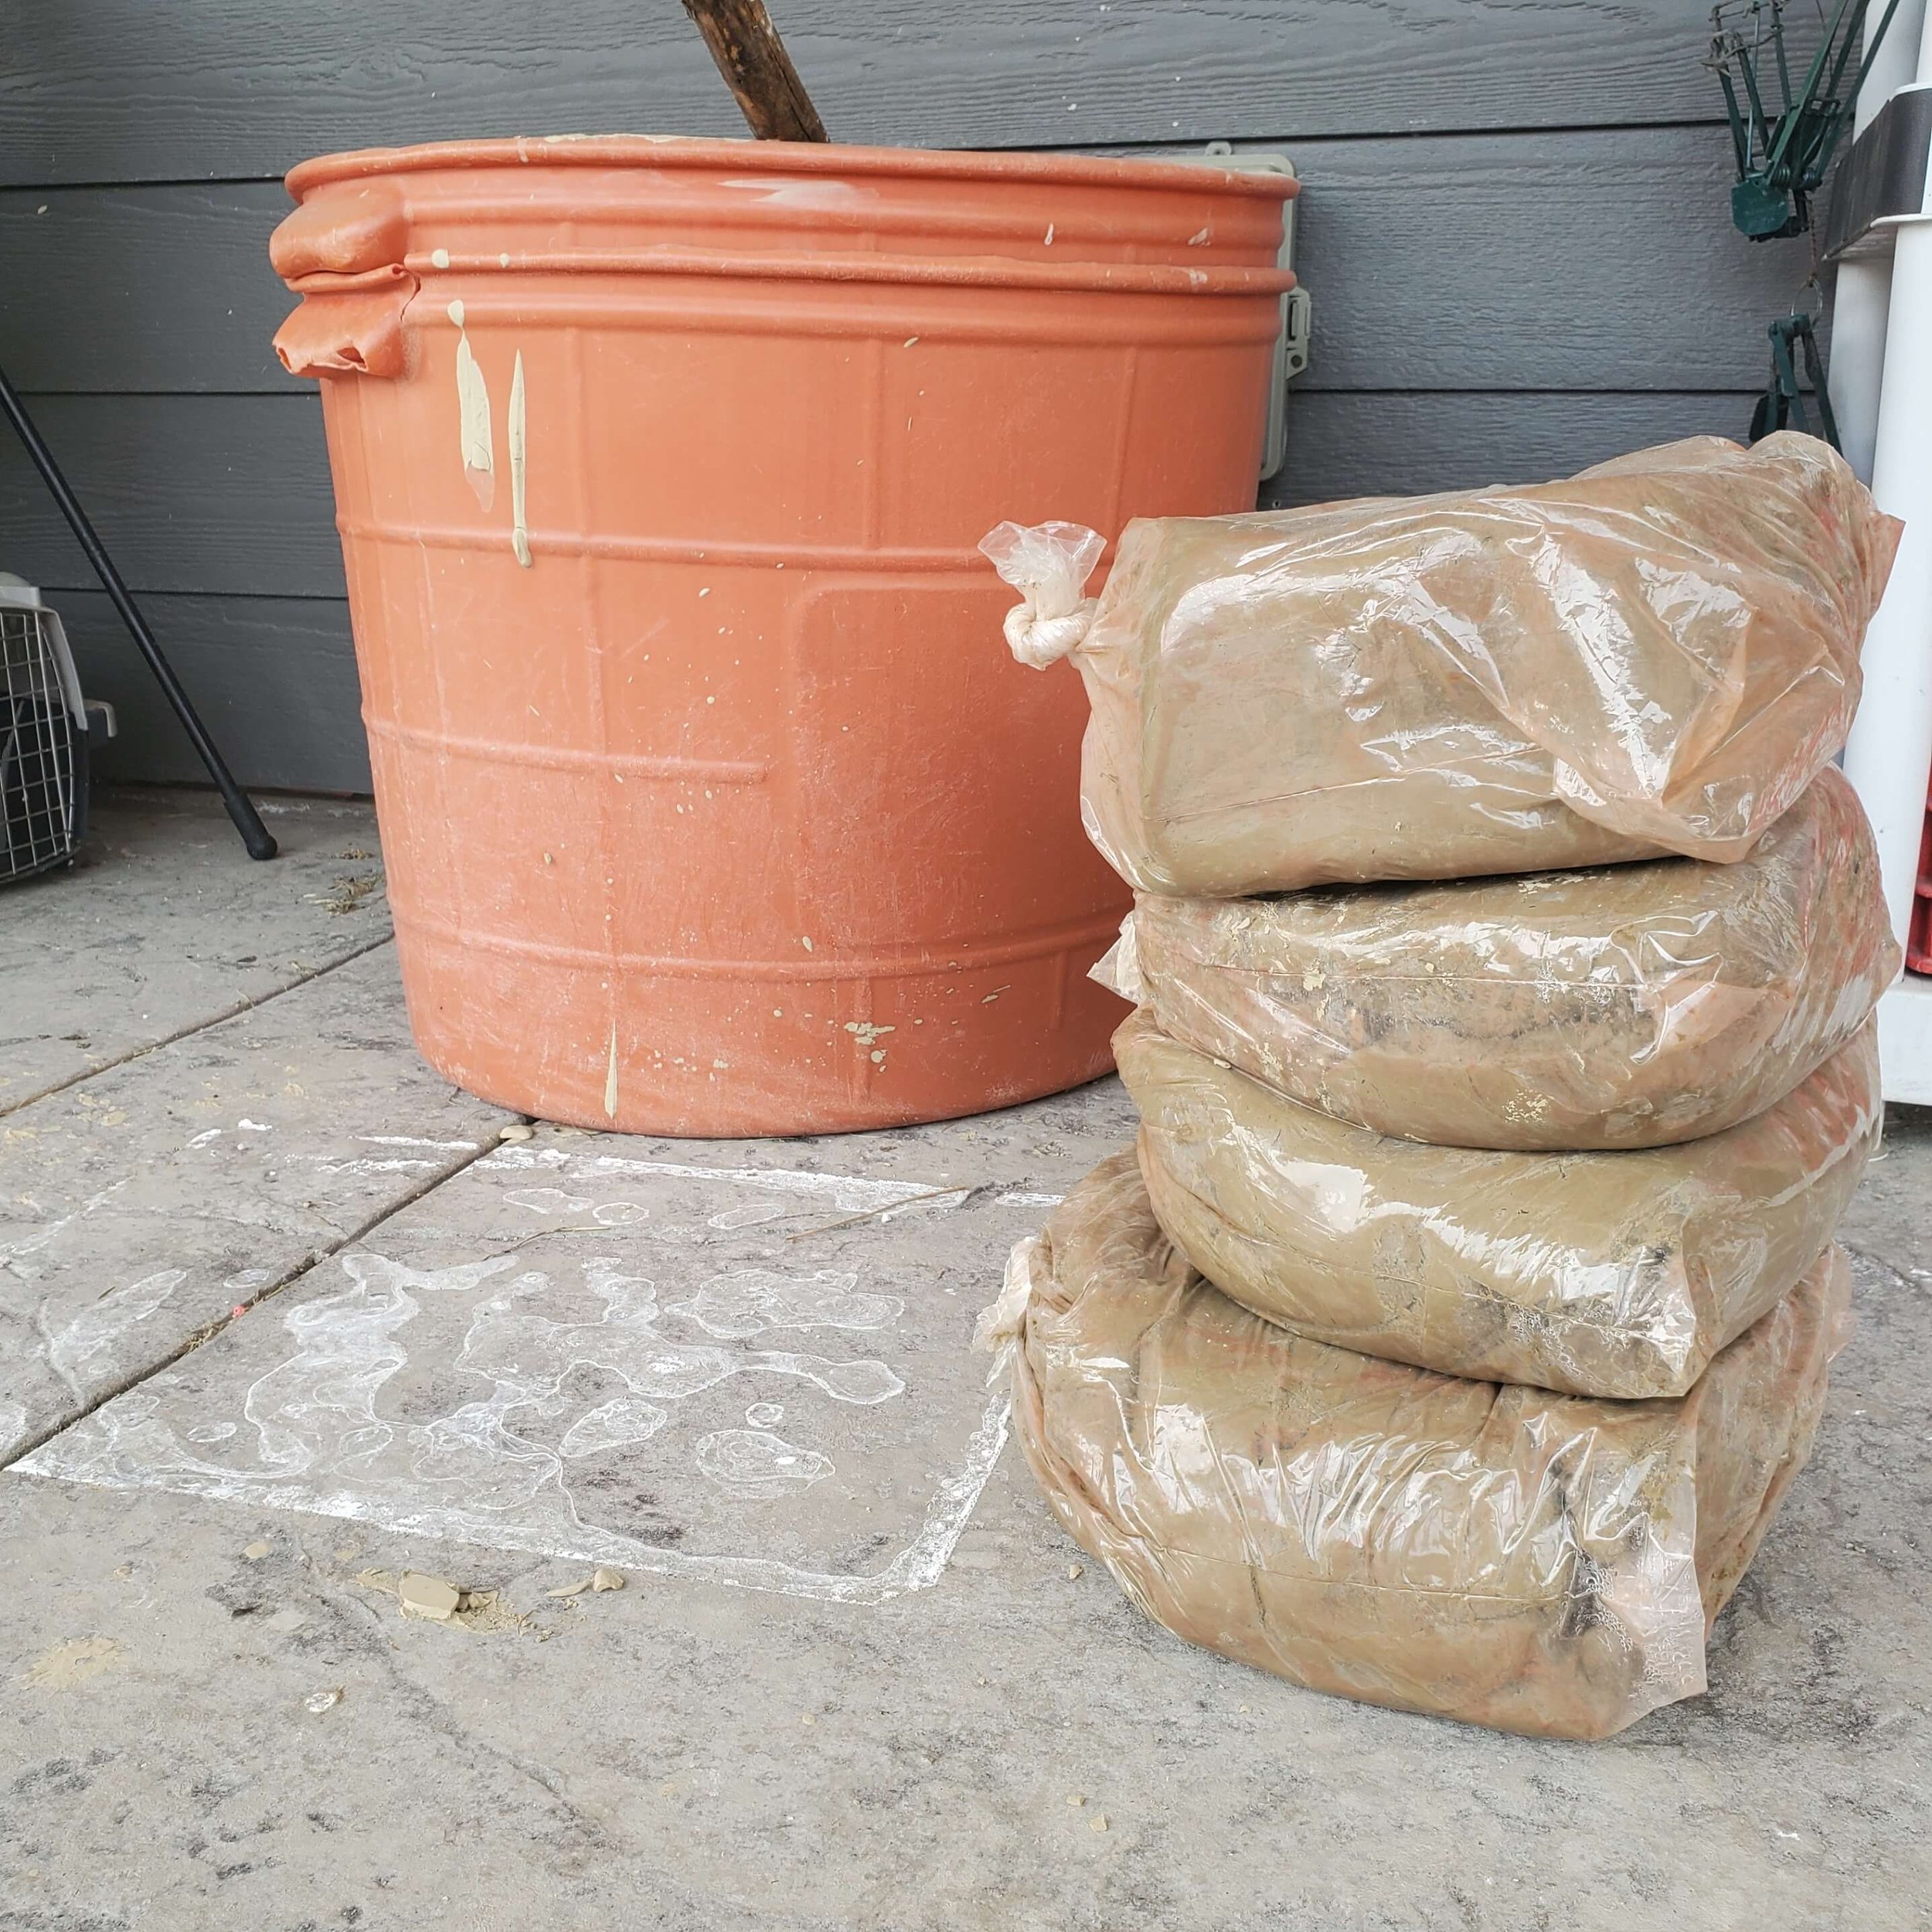
We moved in September 2020 and I didn’t touch the bags of clay until the next summer. I dumped the dry clay into a bucket, filled it with water to let it “slake down”, and then sucked the extra water off with a syringe over the course of a week. When the clay was a thick slurry, I spread it on plaster to dry overnight and then when it was the right consistency, I put it into plastic bags. You can scroll trough these photos of the process:
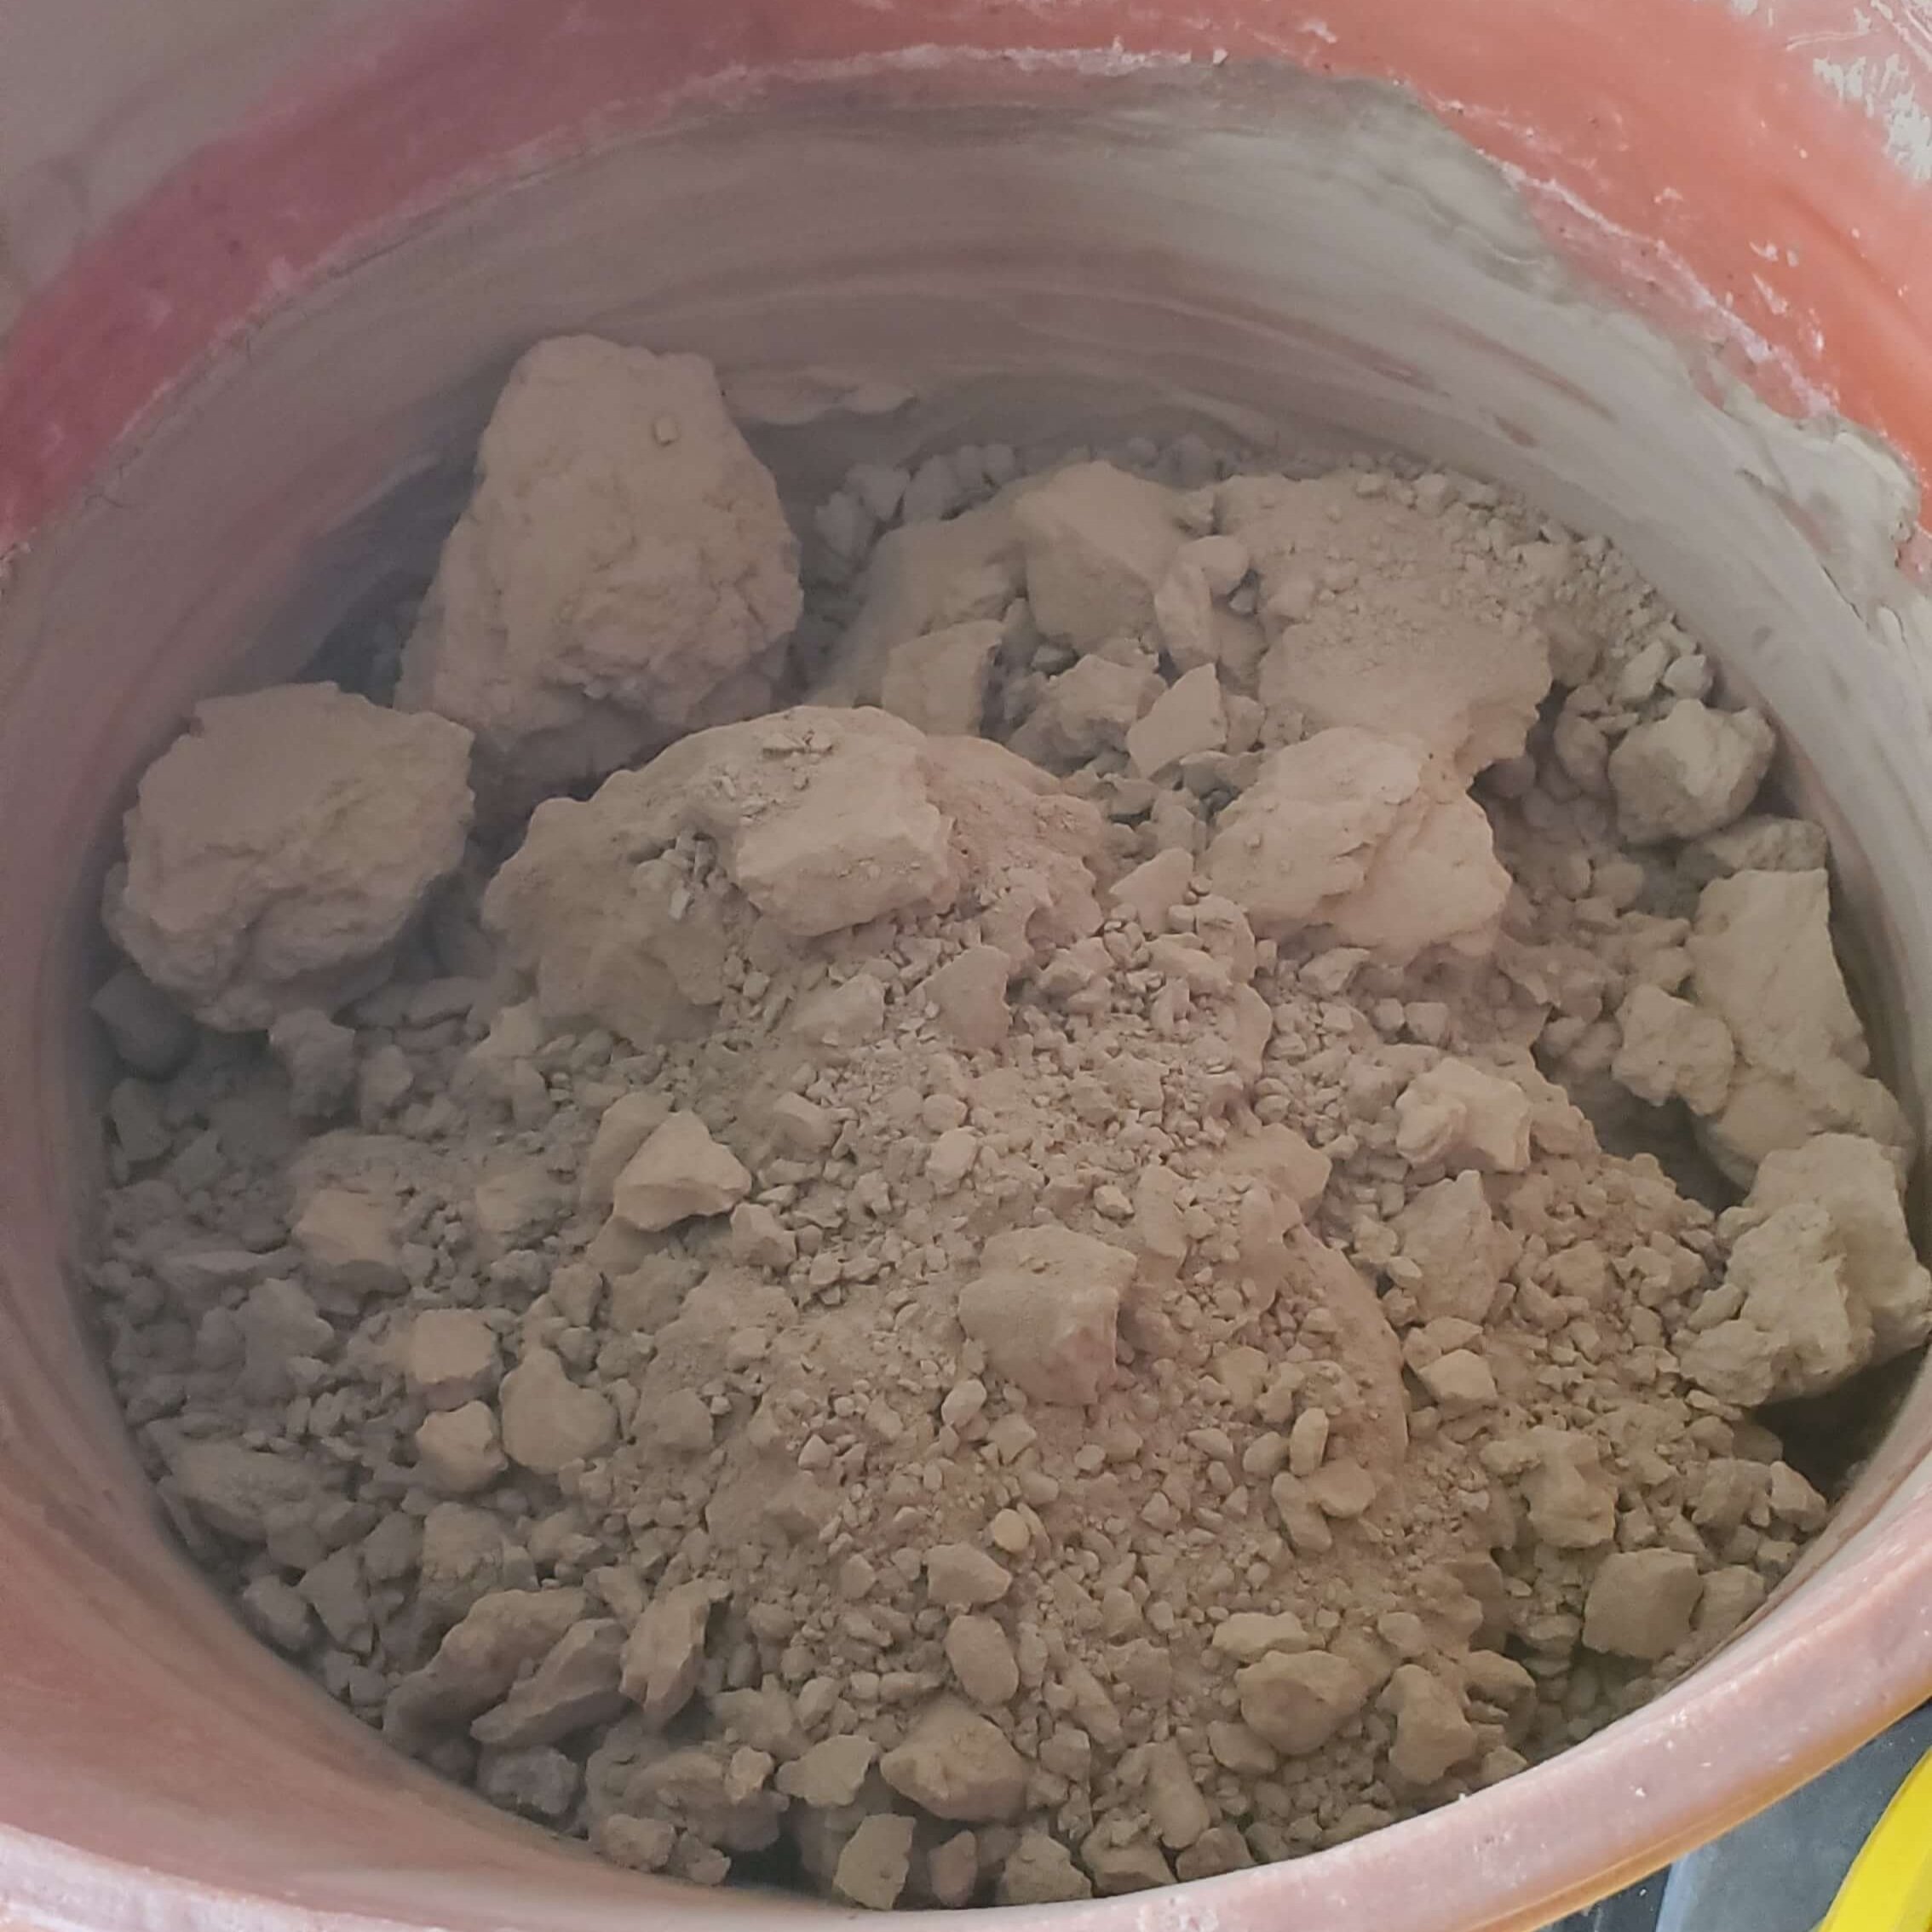


This clay is quite smooth just as it is. Starting with pinch pots, I made a number of items with the clay without processing it at all, and observing the way it behaved: does it crack? warp? smell bad? how strong is it when it’s dry? can I slab build with it? what happens when I dry it faster or slower? The process was incredibly satisfying, even though I didn’t quite know what I would end up doing with it.
I found this feeling refreshing. With my dependable and predictable commercial clay, I can decide ahead of time what I want the clay to be, and make it happen. With the wild clay, I had to pay closer attention to understand what it wanted to be, instead. There was a burning curiosity but also a contented feeling of peace as I slowed down and learn from this clay.
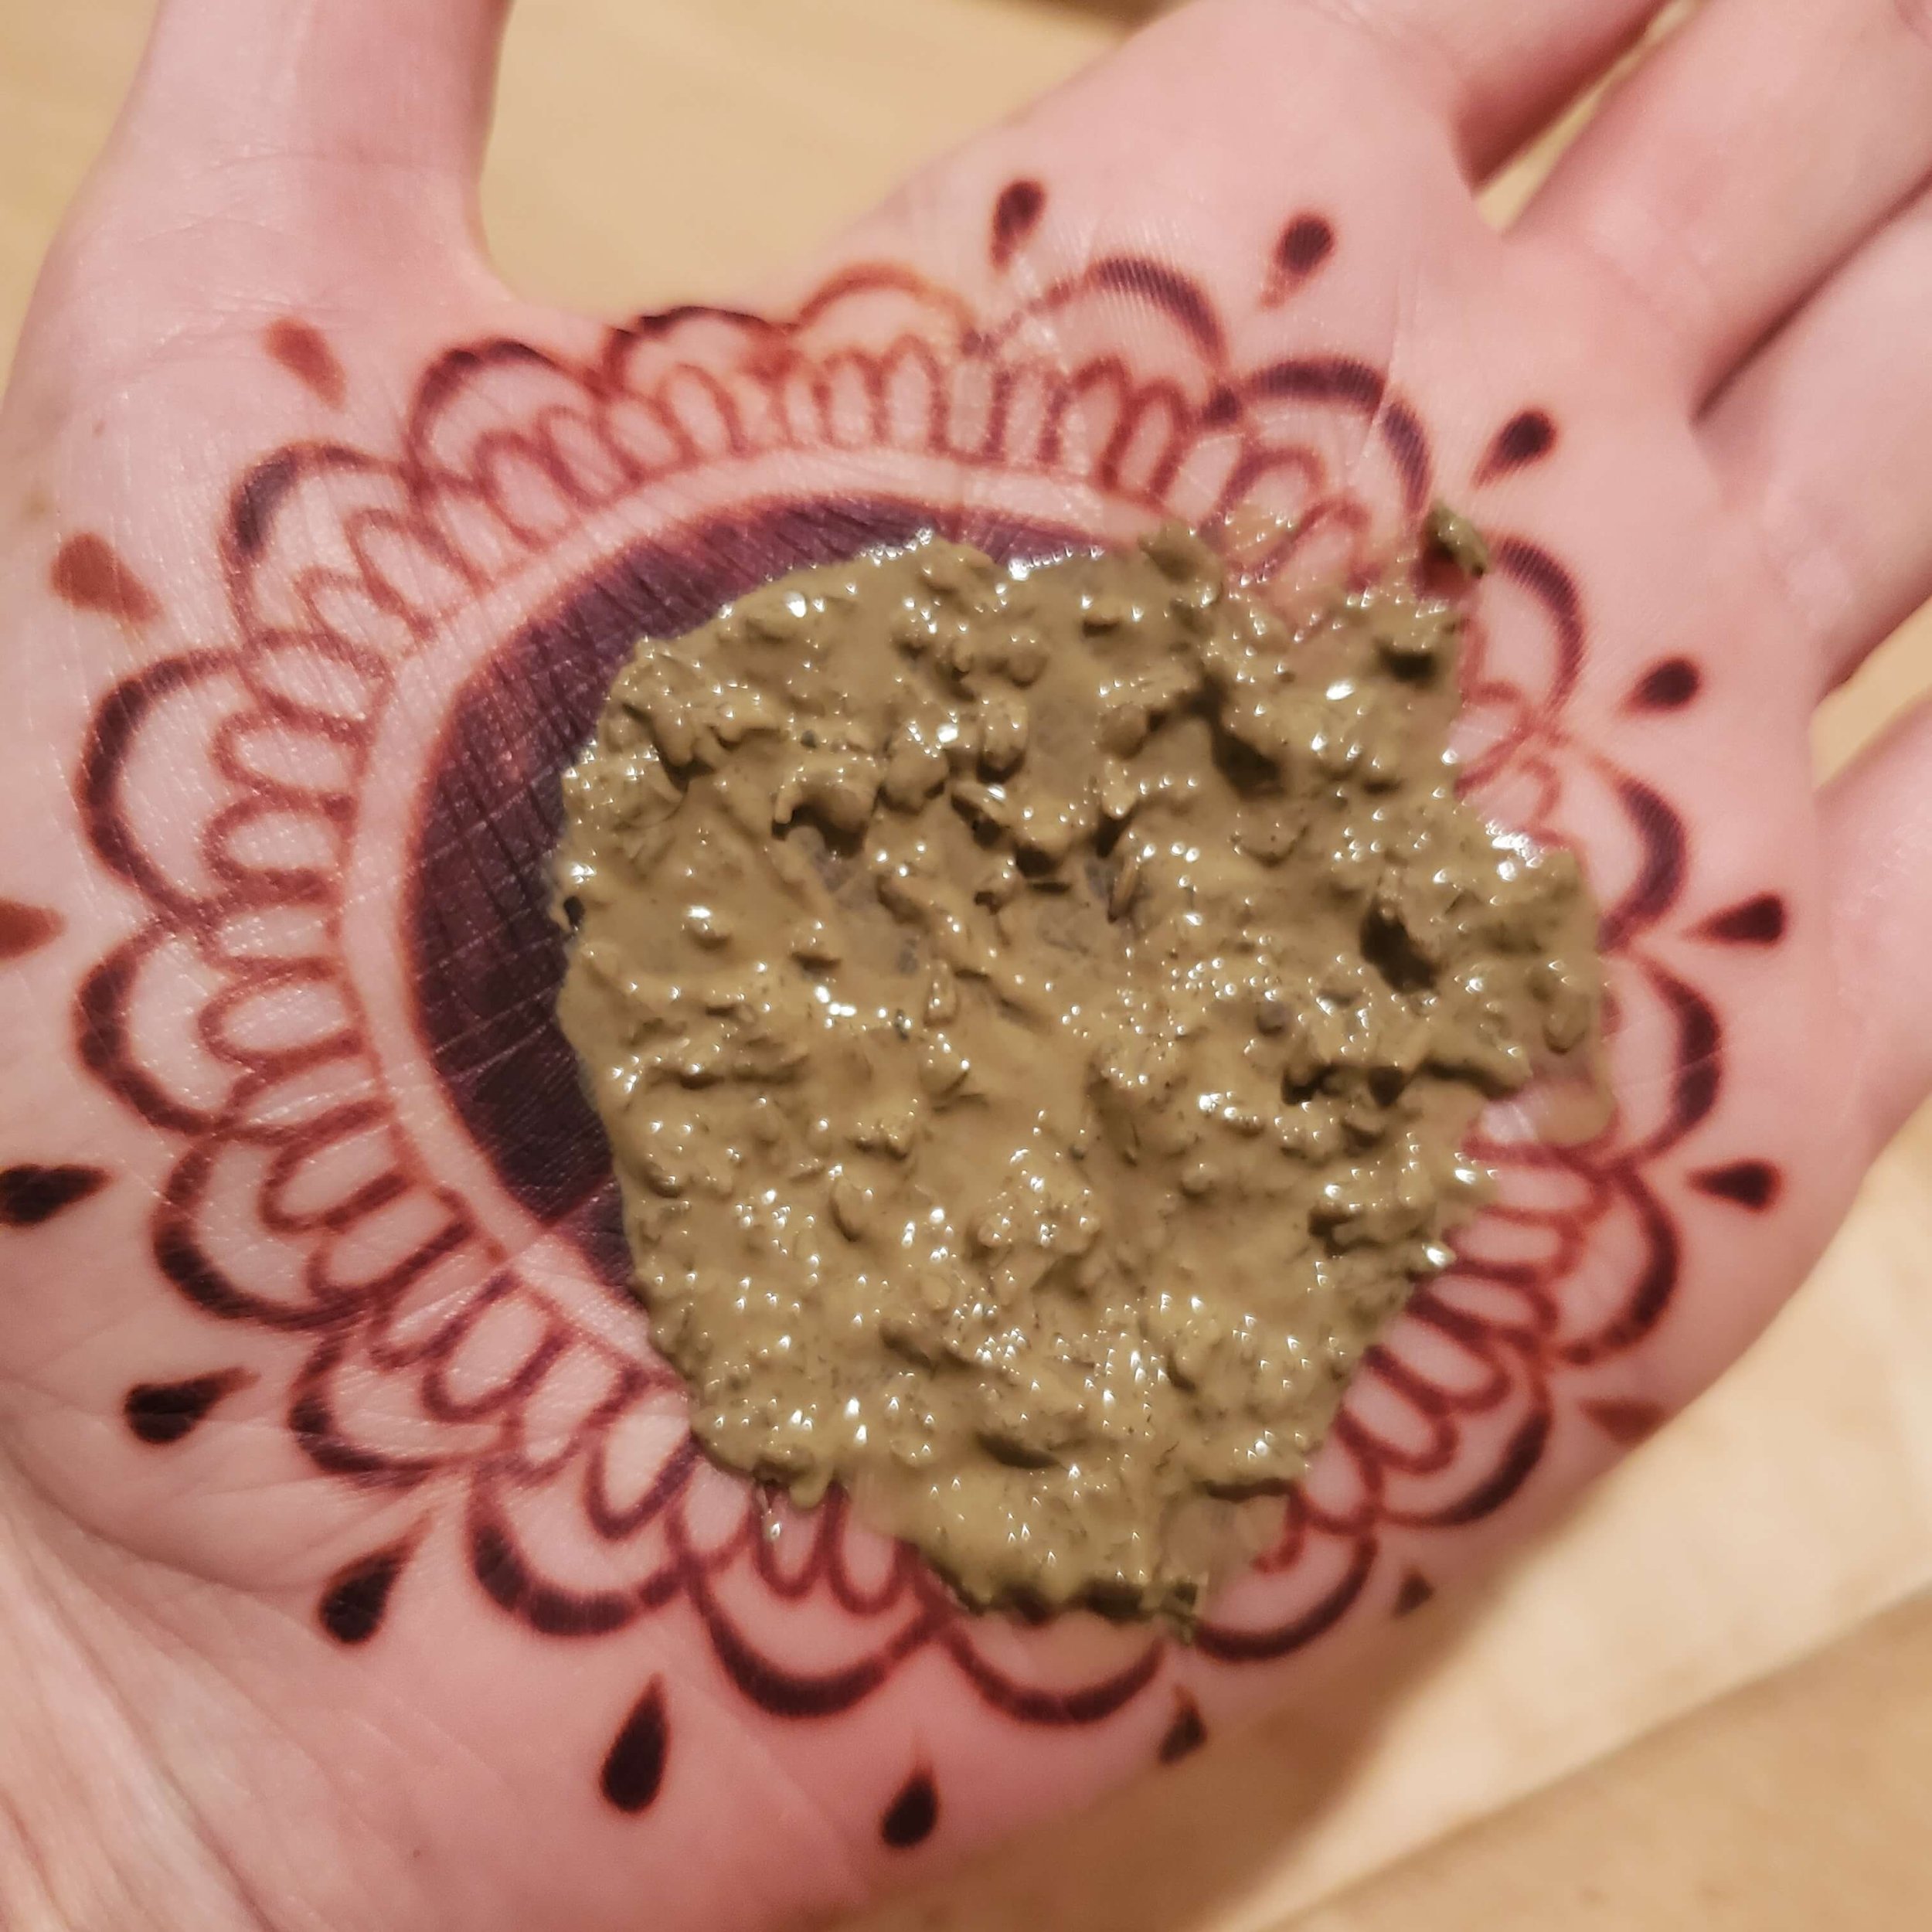
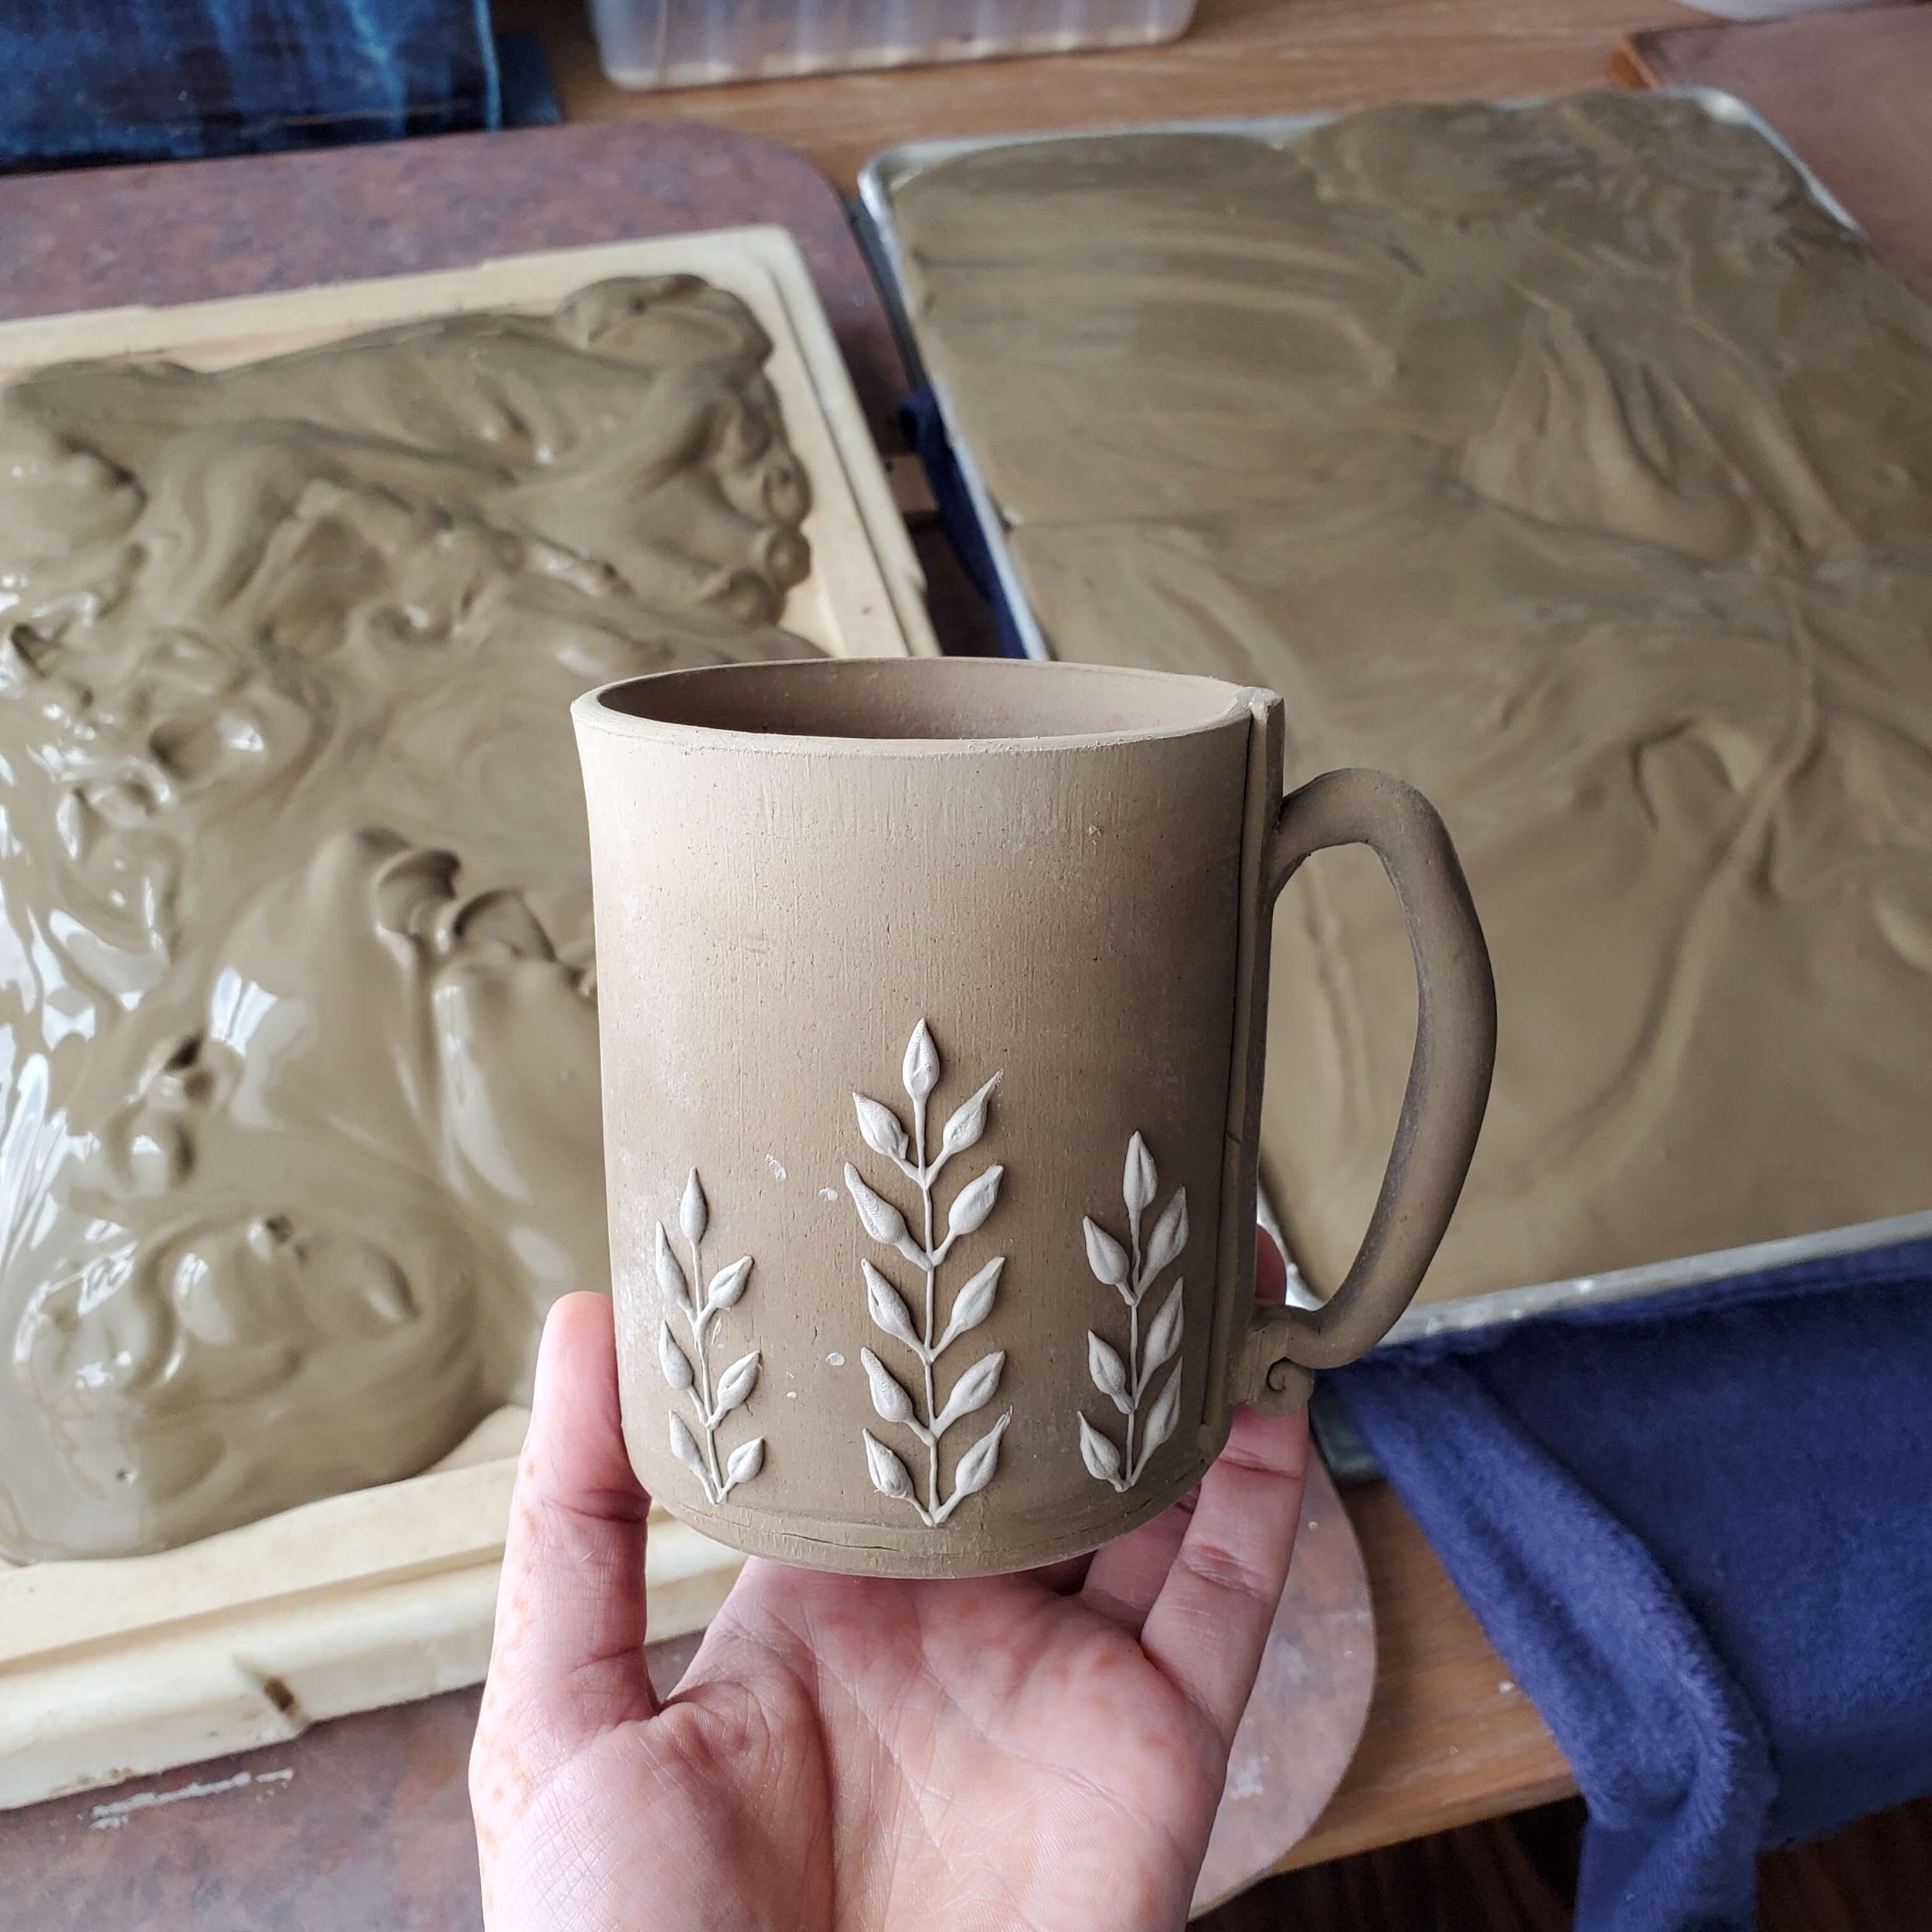
The pinch pots were turning out great, but when I tried to slab-build with it, I discovered there were many tiny rocks in the clay that were causing it to rip or crack. I decided to re-hydrate some of the clay and pour it through a mesh sieve (just a regular kitchen sieve, maybe 30 mesh size) to get rid of some of those rocks. In the photo below, you can see the muddy texture of the pebbles on my palm with the henna design. The next photo shows my first successful mug with more of the clay slurry drying in the background.
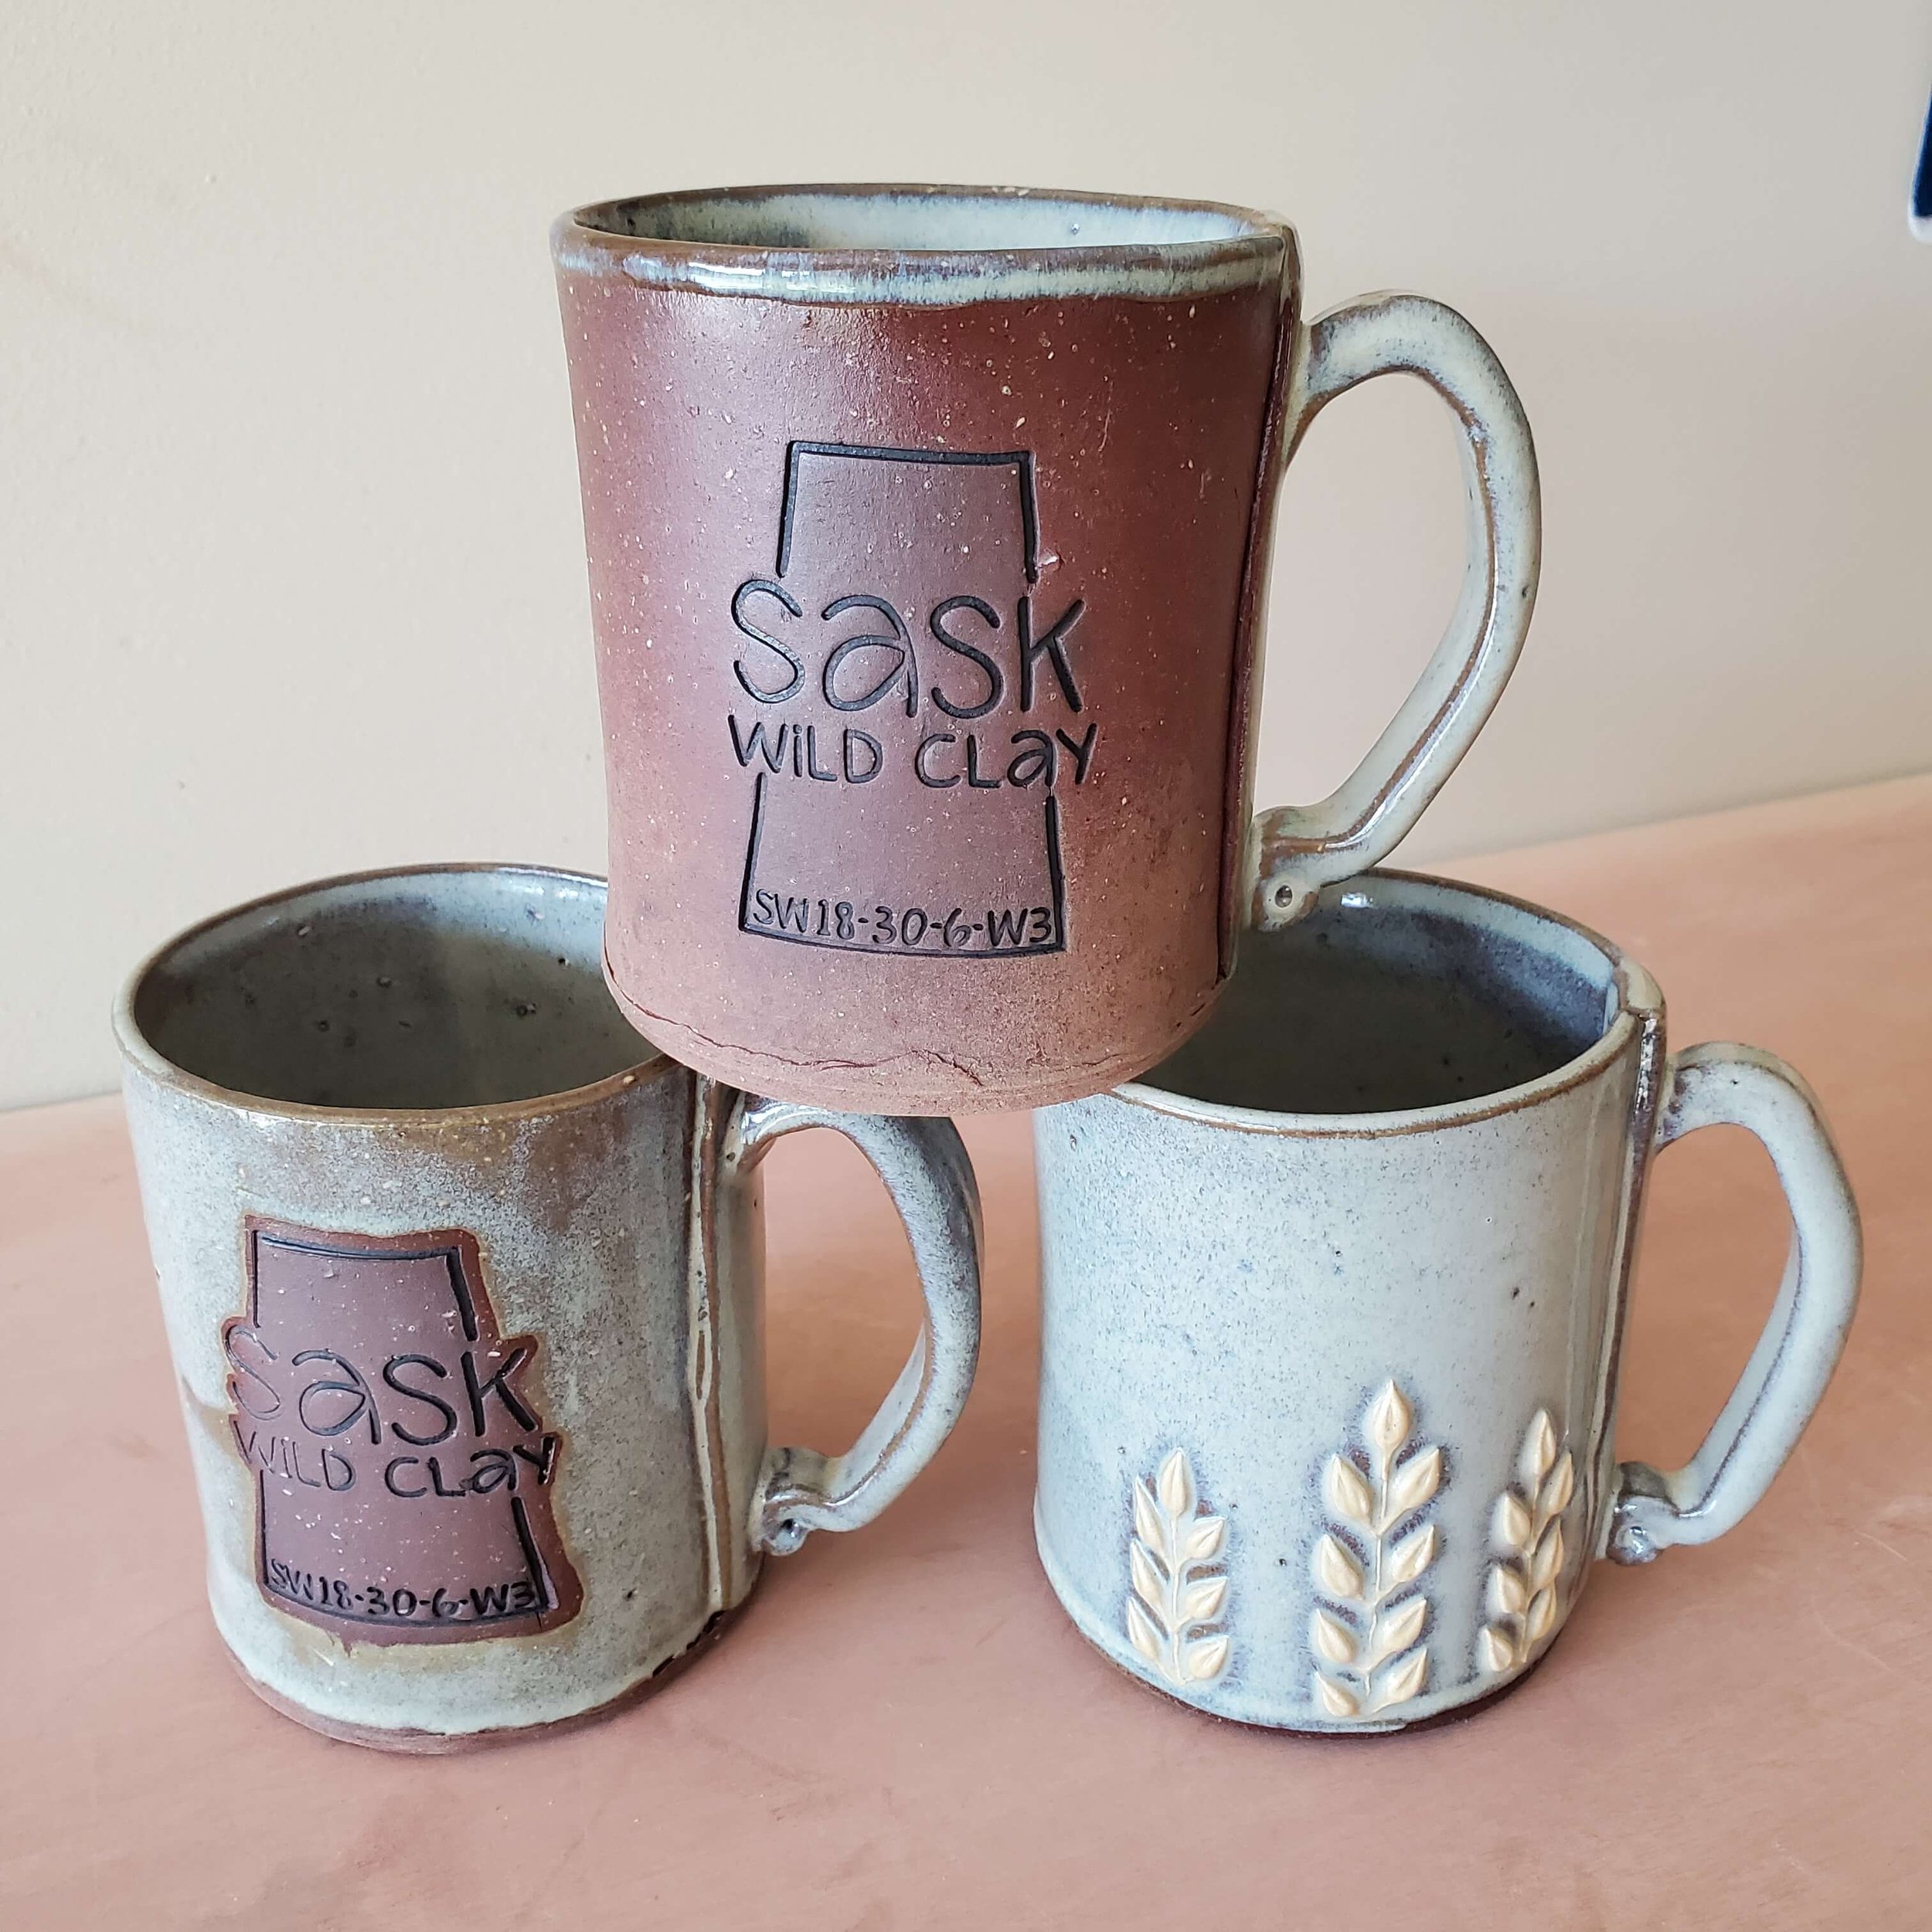
I also had an idea to make a stamp with the land location of the clay, and they turned out fantastic!

By now it was November 2021 and my busy season making enough pottery for the holiday season had slowed down, so I could take time to experiment with the different temperatures for firing this clay. Since I knew the clay was fine at cone 04, I bisqued everything in preparation for “someday” when I could figure out what it wanted to be fired at.

My first collection of Saskatchewan Wild Clay pots, bisqued to cone 04.
Next comes the intense testing phase. First, I made a bunch of discs and bisqued them all to cone 04. The goal with tableware pottery is to get as close as you can to 0% porosity while still maintaining the integrity of the clay. At cone 04, this clay was 17% porous (measured by weighing the dry disc, then soaking it in water for 3 hours and weighing it again).
I have a manual kiln so I had to buy a bunch of witness cones and kiln sitter cones in order to do these test firings. Luckily my supplier, Greenbarn Pottery sells these cones in small amounts so I was able to buy a couple of each instead of boxes of 50!
For my test firings I would fire the kiln empty except for two test pieces, so I didn’t want to waste energy and fire too many tests. I chose cone 1 as an “educated shot in the dark” to start with. It was 8% porous. This was great news - I was getting close! At cone 2, the clay was 6% porous and at cone 3, my scale couldn’t register the difference. I decided to fire it to cone 4 as well just to see what happened, and the disc started to bubble a little bit, and the vertical test tiles I put in at the same time slumped over. So, the answer is: cone 3!

Wild clay test discs showing a colour change and porosity difference as the temperature is increased

At cone 3, the wild clay maintains its shape and integrity. At cone 4, the vertical tile slumps over and the clay develops ‘blisters’.
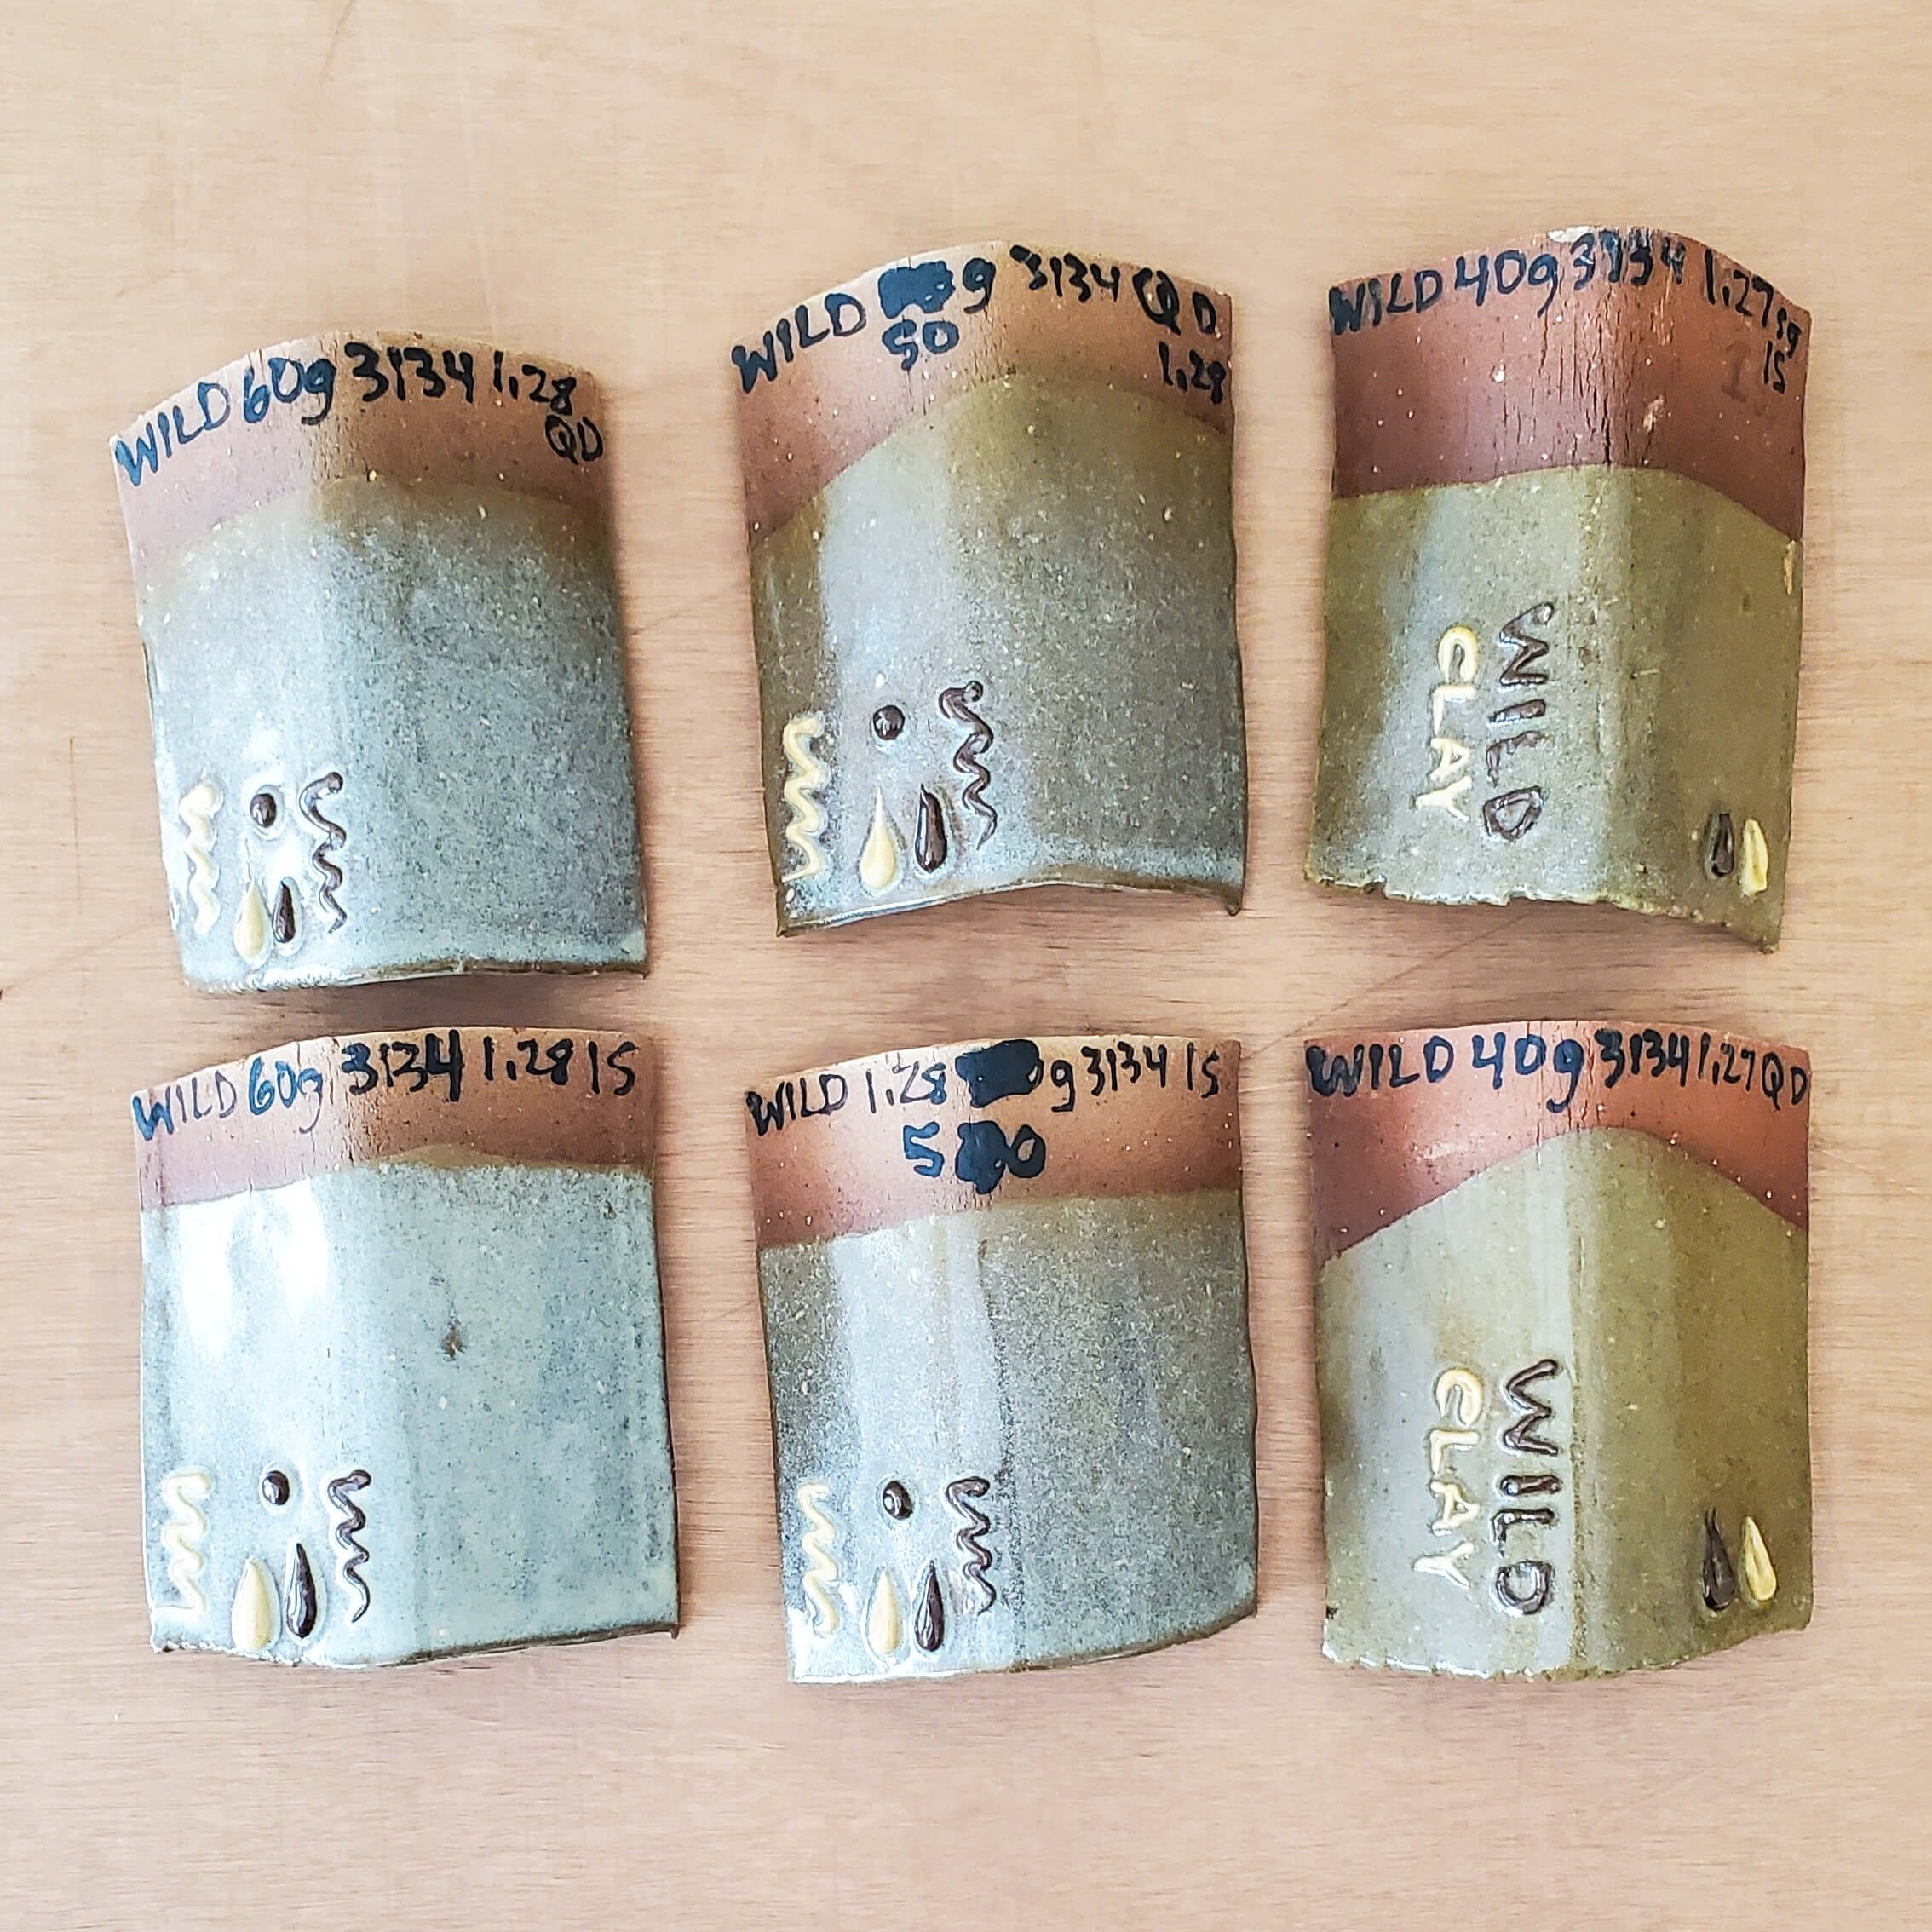
Next, I had to decide on how to finish my pieces. I knew I wanted to show off the clay itself and not cover it with glaze, but I didn’t want to make fully bare pieces either. I tried out a glaze recipe for a white glaze using ‘normal’ glaze ingredients (top row, beside round test shrink tile), but I also tried using the clay itself as a glaze. I made it into a slurry and tested it with an ingredient called Frit, which helps the clay melt at a lower temperature, creating a smooth + glassy surface. I tried Frit 3134 (middle row) and 3195 (bottom row) in different increments from 30-60 grams per 100 grams of clay, I was absolutely astonished at the range of colours and the beautiful texture I got from the wild clay glaze. I decided to ditch the ‘regular’ glaze and continue testing with Frit 3134.

I tested different thicknesses, different dip times, and different amounts of Frit. So. Much. Testing!! But, it’s getting really close!
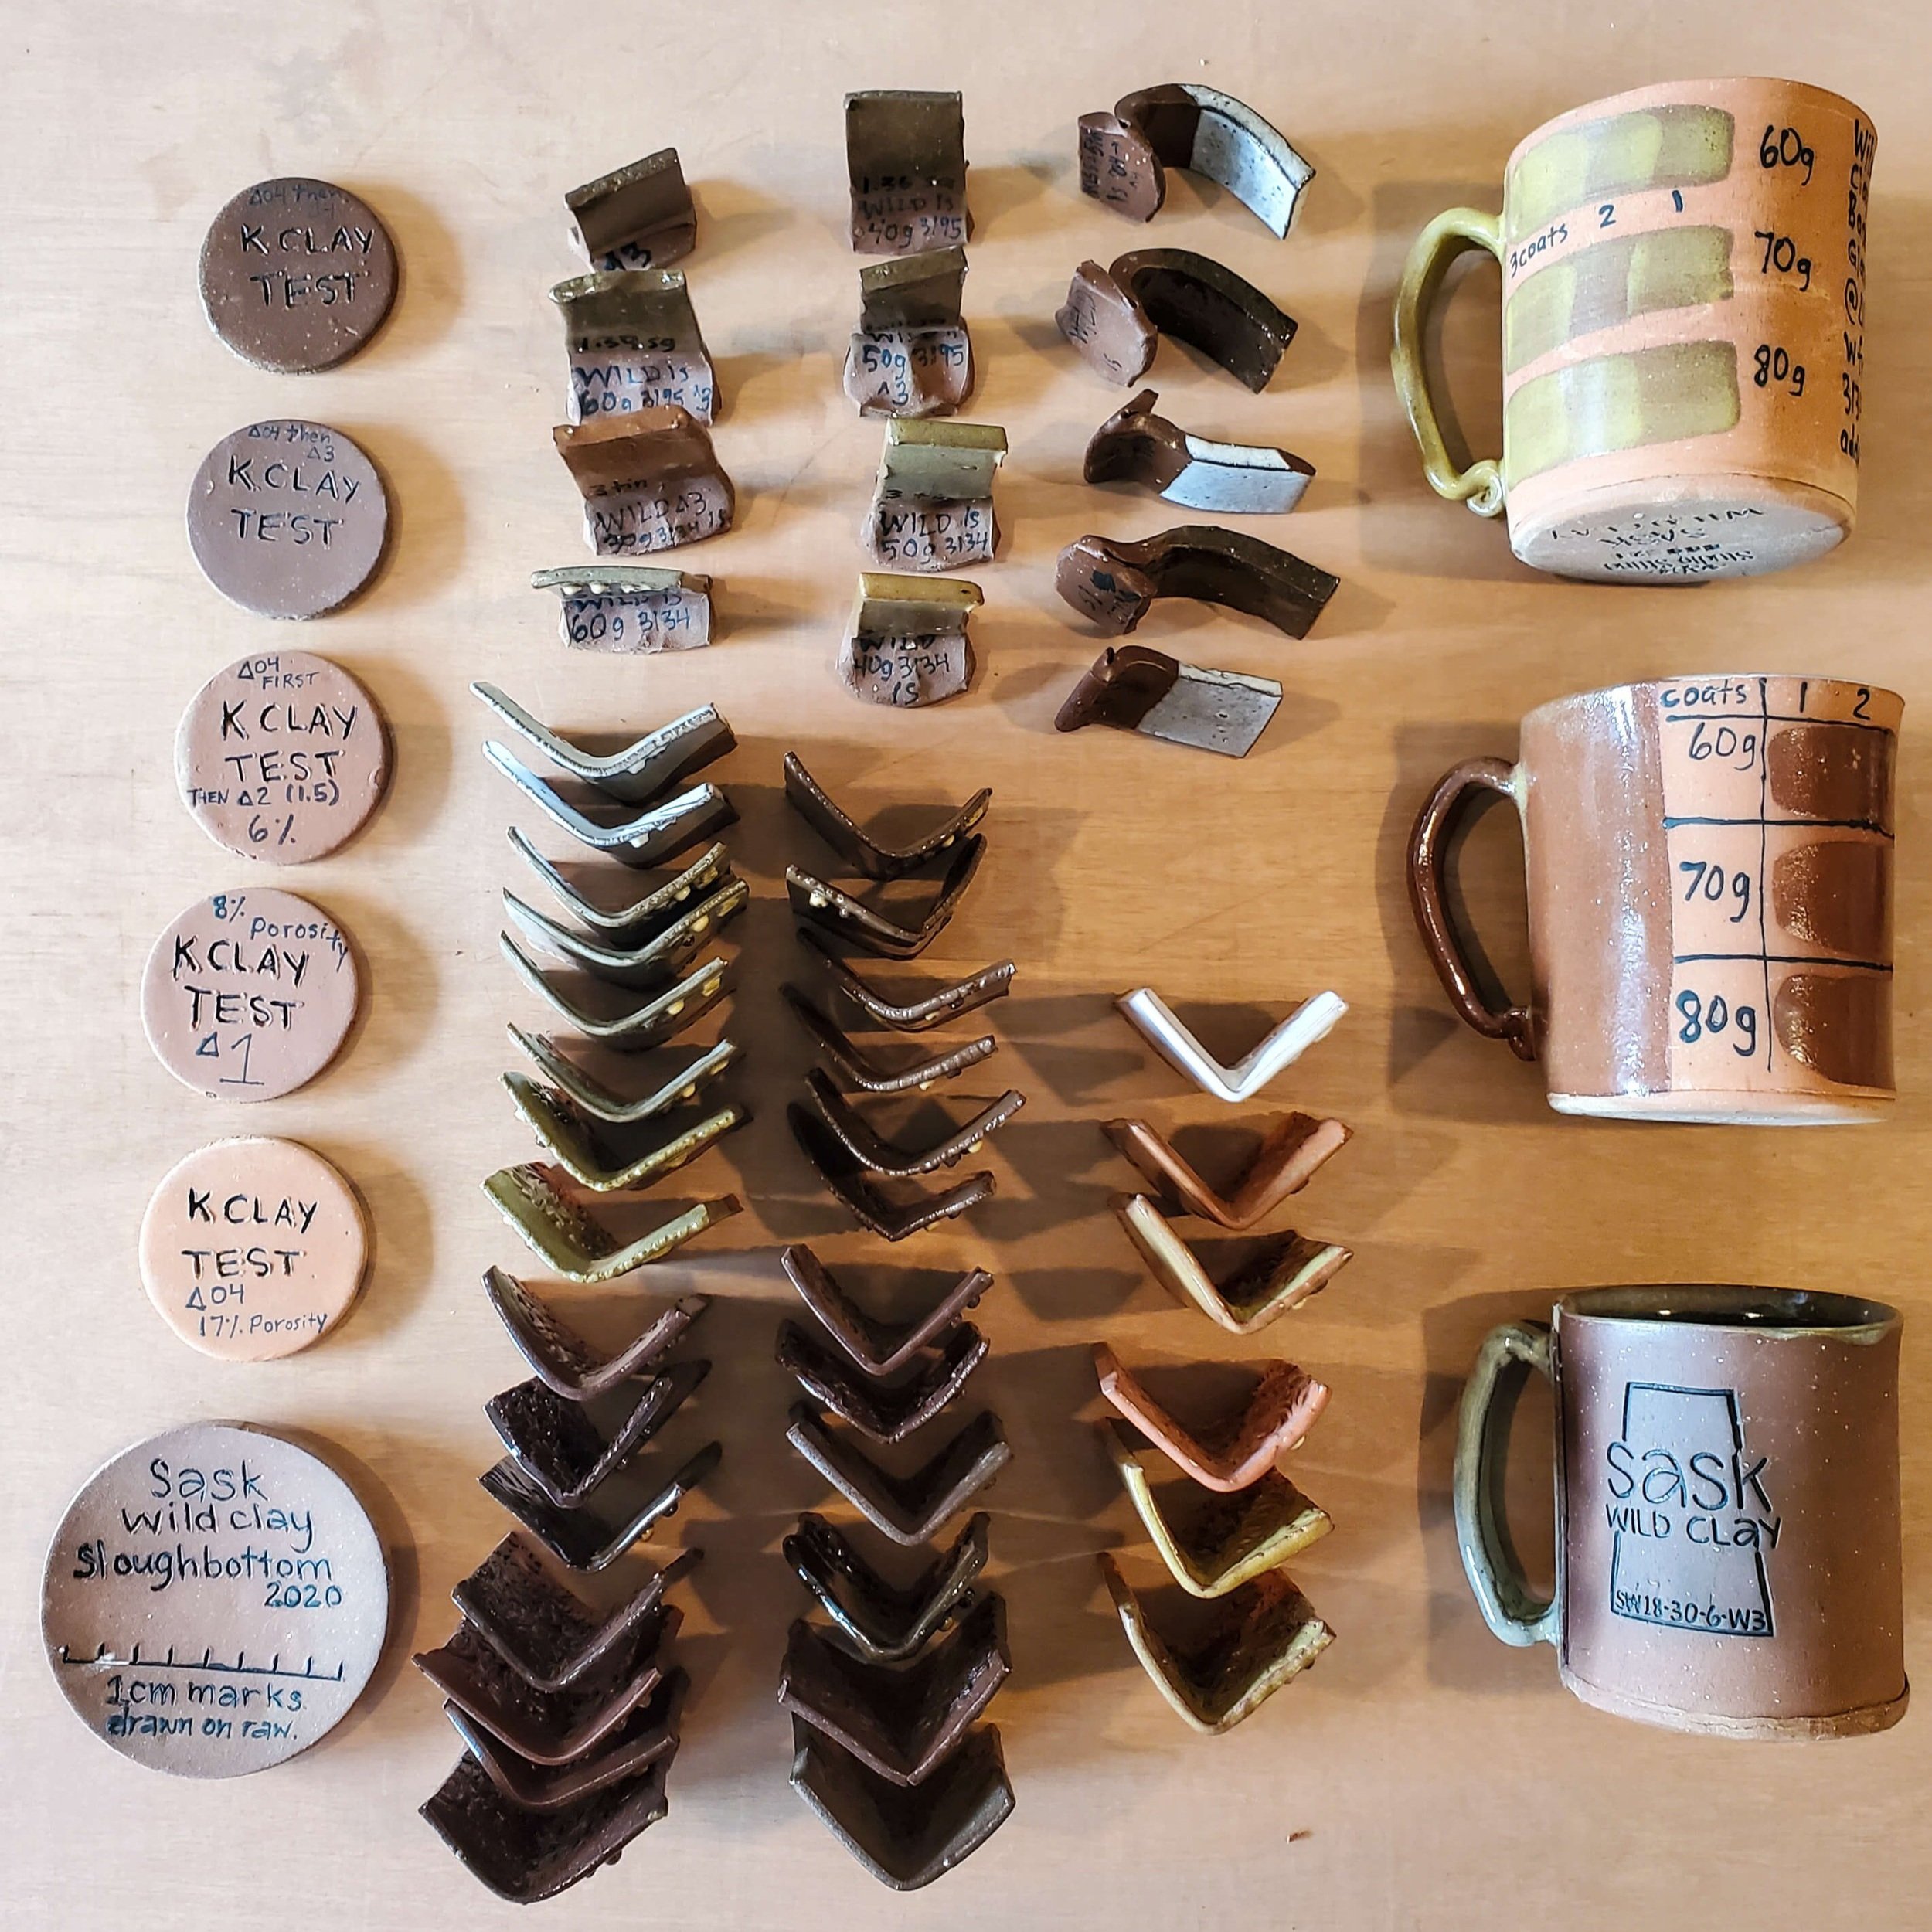
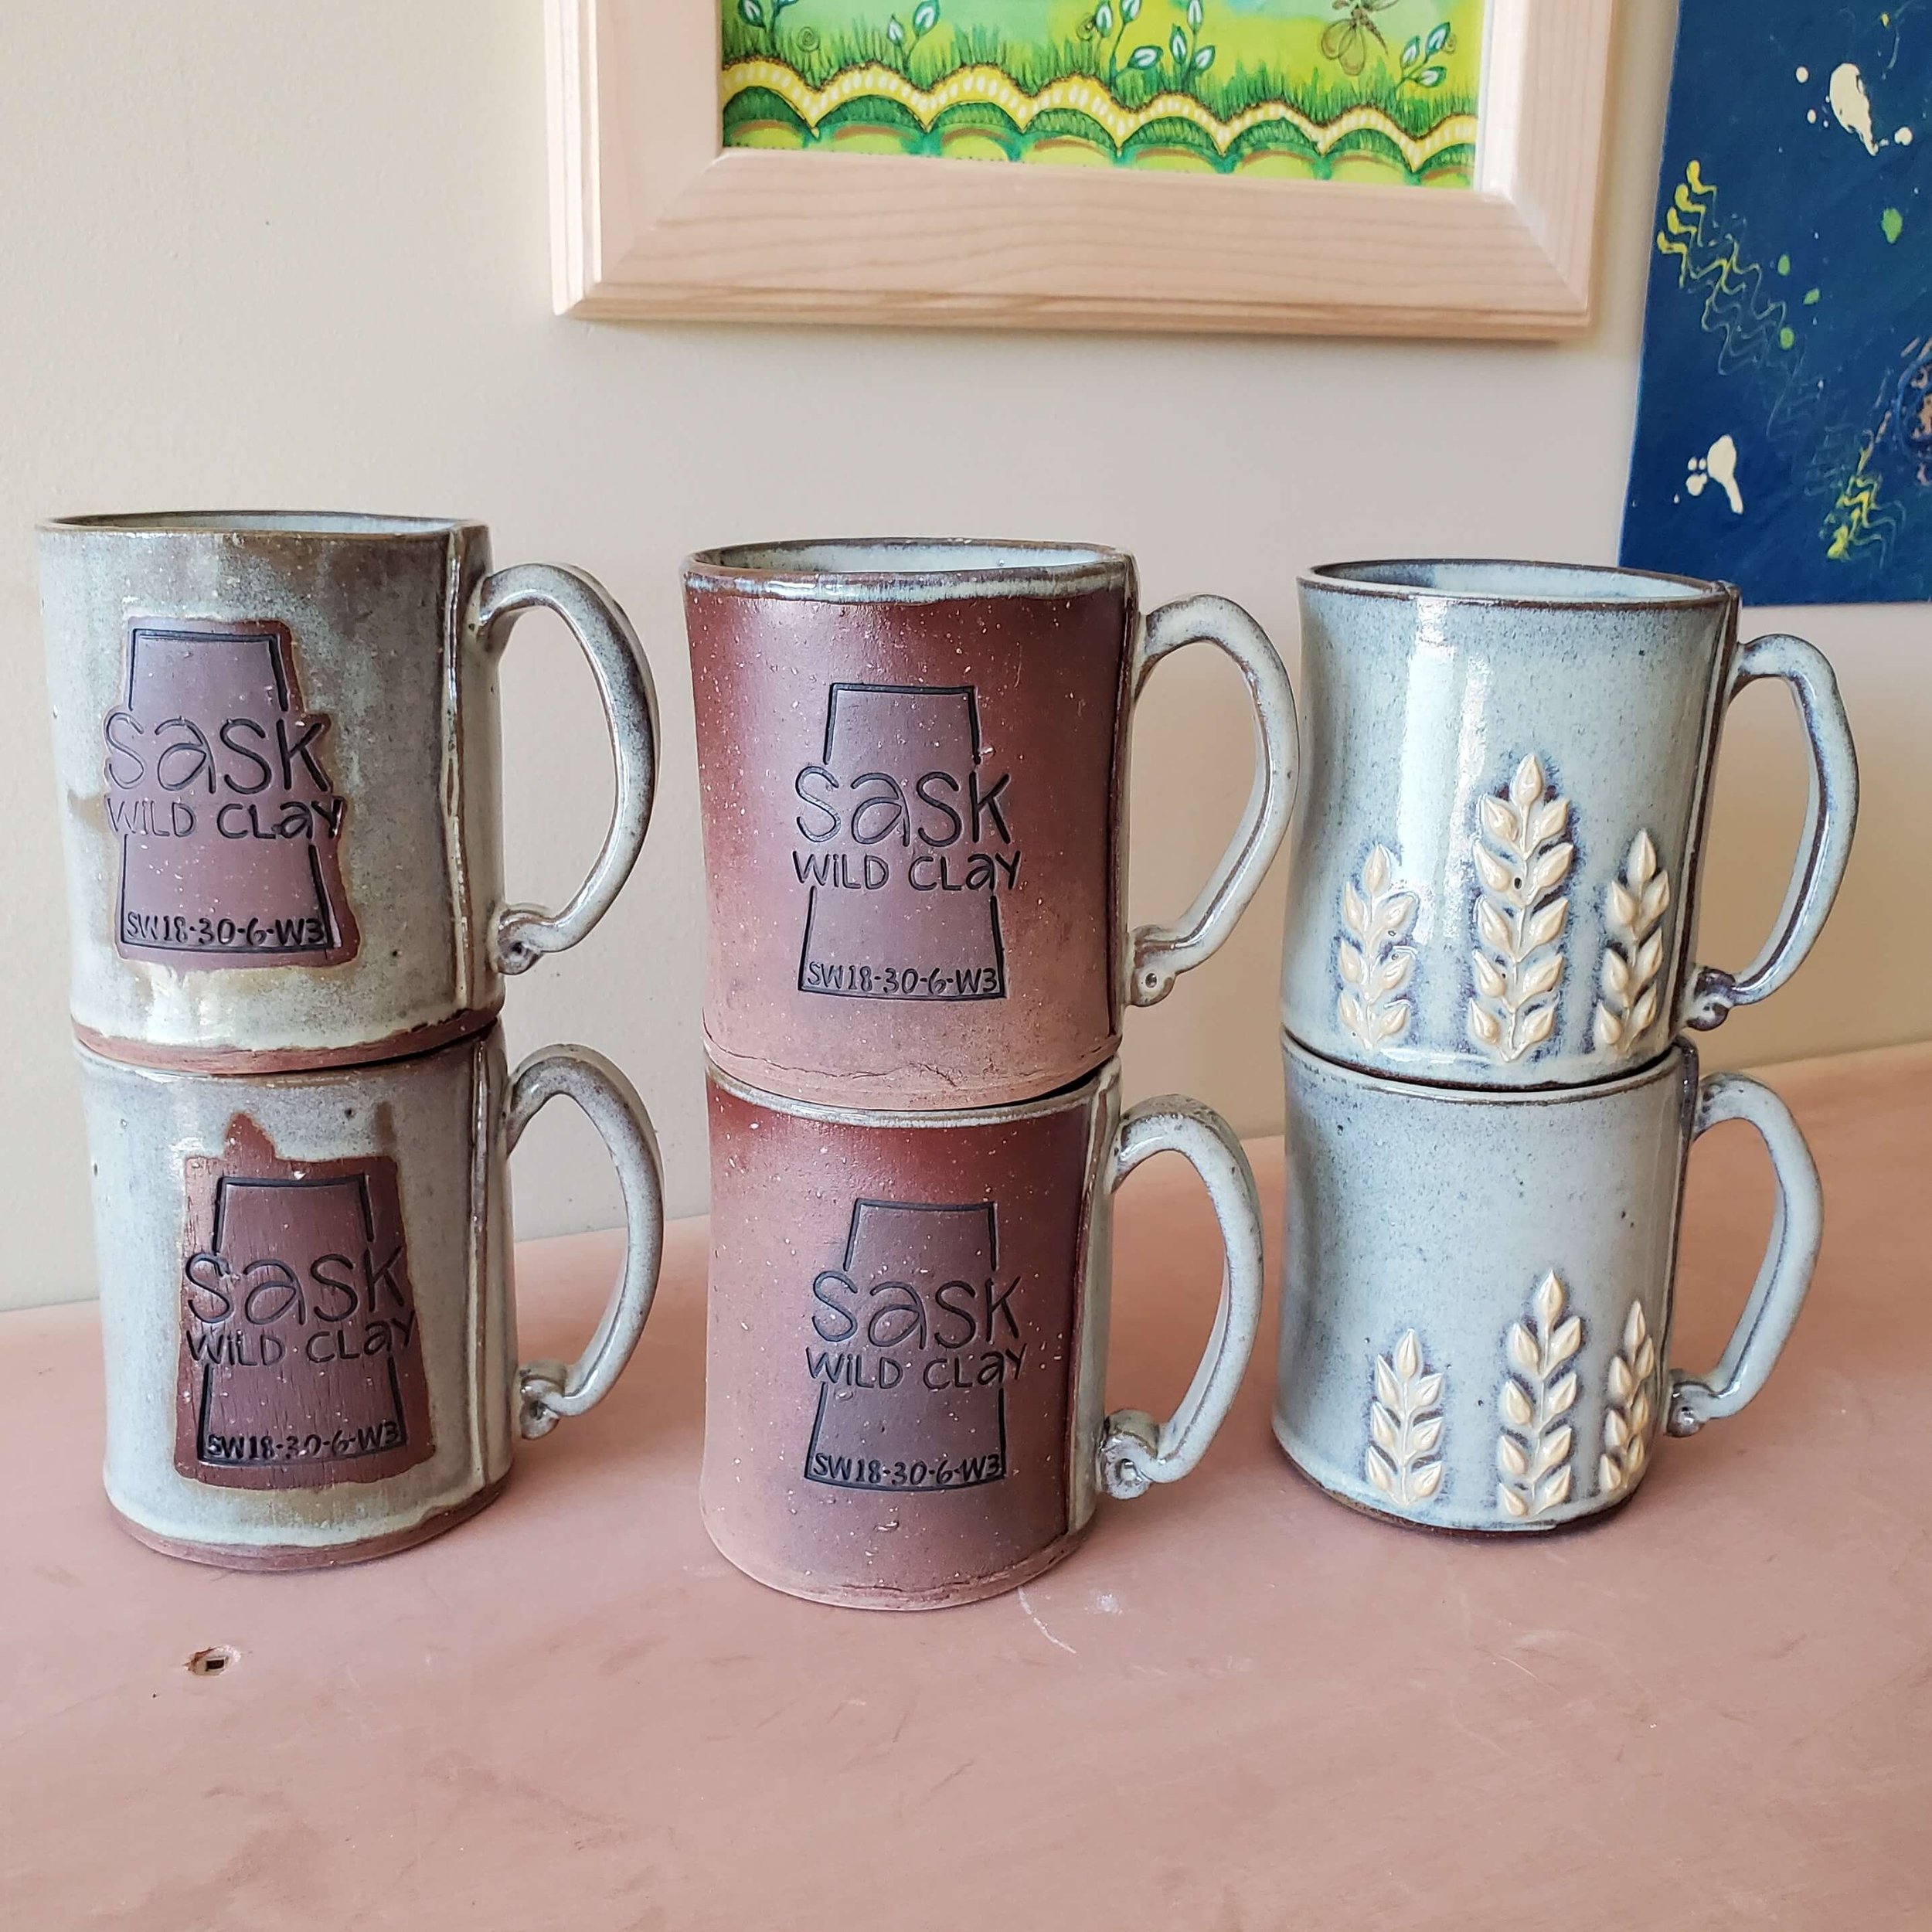
I decided on the glaze I wanted to use, and fired 4 vases and a mug with the glaze as a liner. They turned out stunningly beautiful!
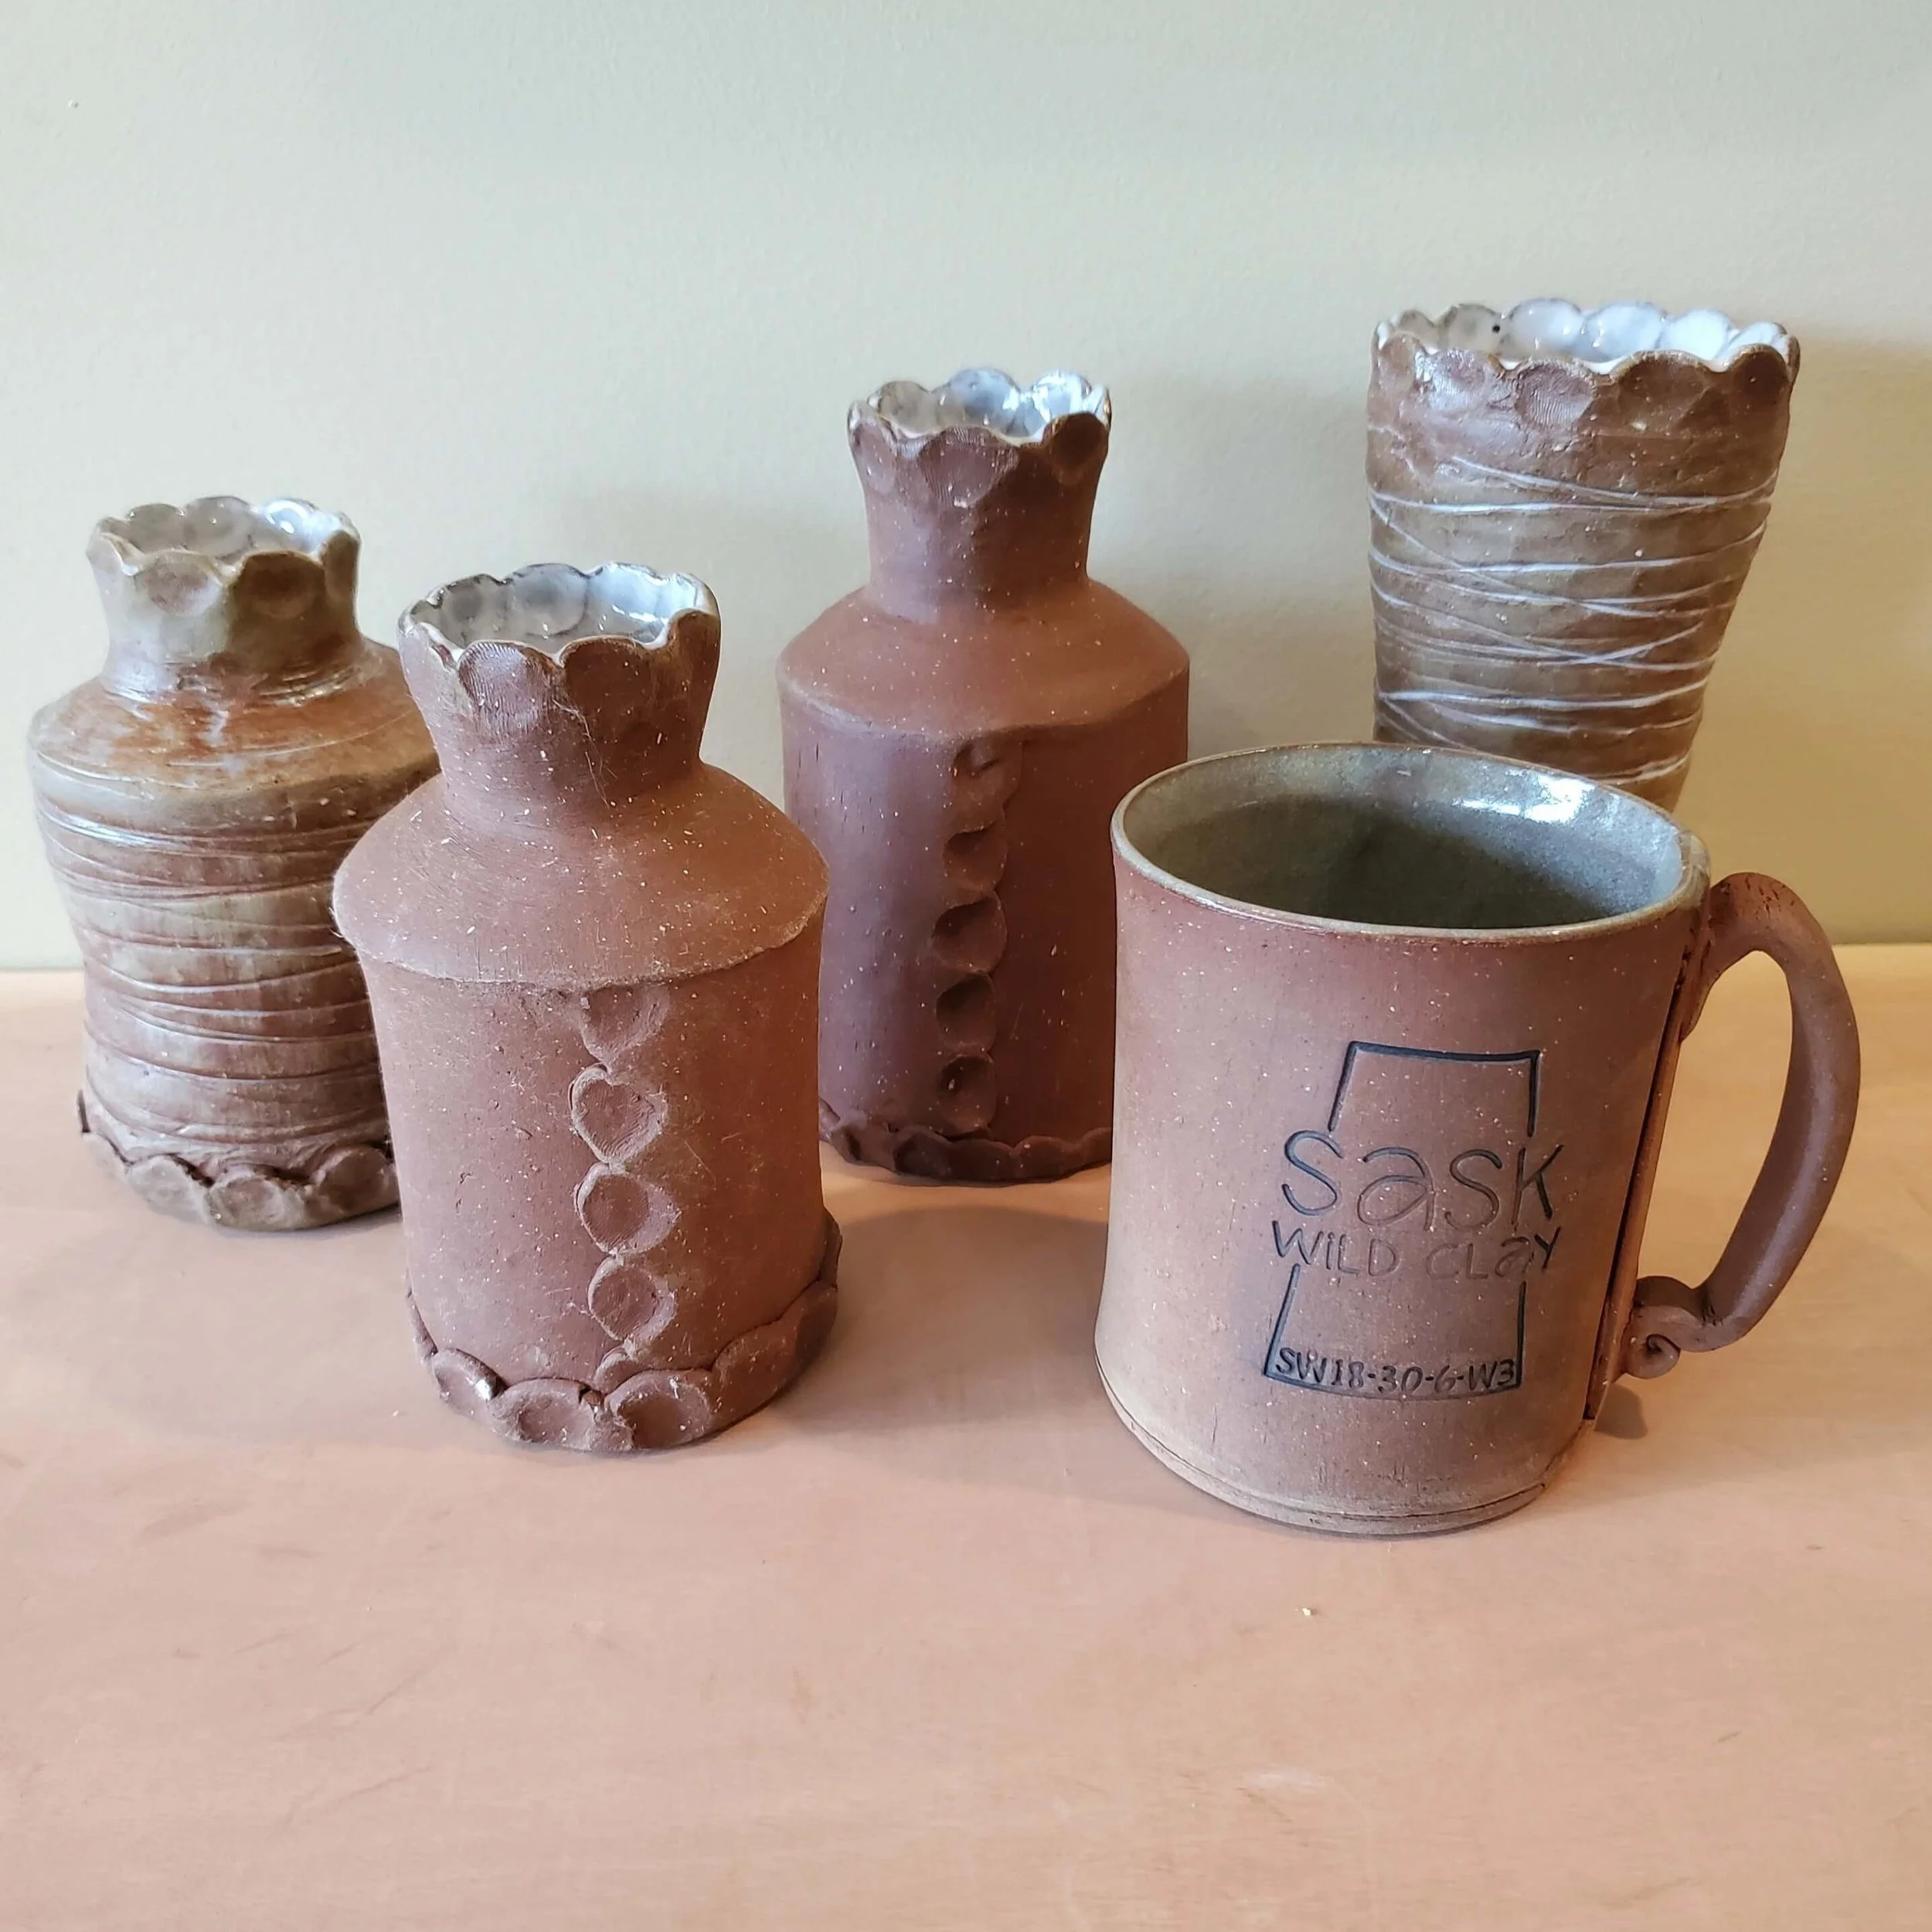
My first batch of finished Saskatchewan wild clay pottery! April 2022
Next, I did more tests with the finished pieces: I did an acid leaching test on the glaze, a freeze/boil test to see if the mug would crack due to thermal shock, and then I intentionally broke a few mugs to look at the cross-section of the clay and also to see how much force it would take to do so! I was really pleased with how the clay performed in all of these tests so I decided to go ahead and finish the rest of the pieces I had made in the same manner.
From start to finish it has been a 2 year process of ‘figuring out’ this clay, but it’s only in the past 6 months that I intentionally worked towards finding out if this clay would be suitable for tableware. I’m incredibly proud of myself and of this clay - I would have been happy if all I could do was make magnets with it. But now I can make mugs and beautiful usable everyday pottery that gives me a direct connection to Saskatchewan, the land that I call home.

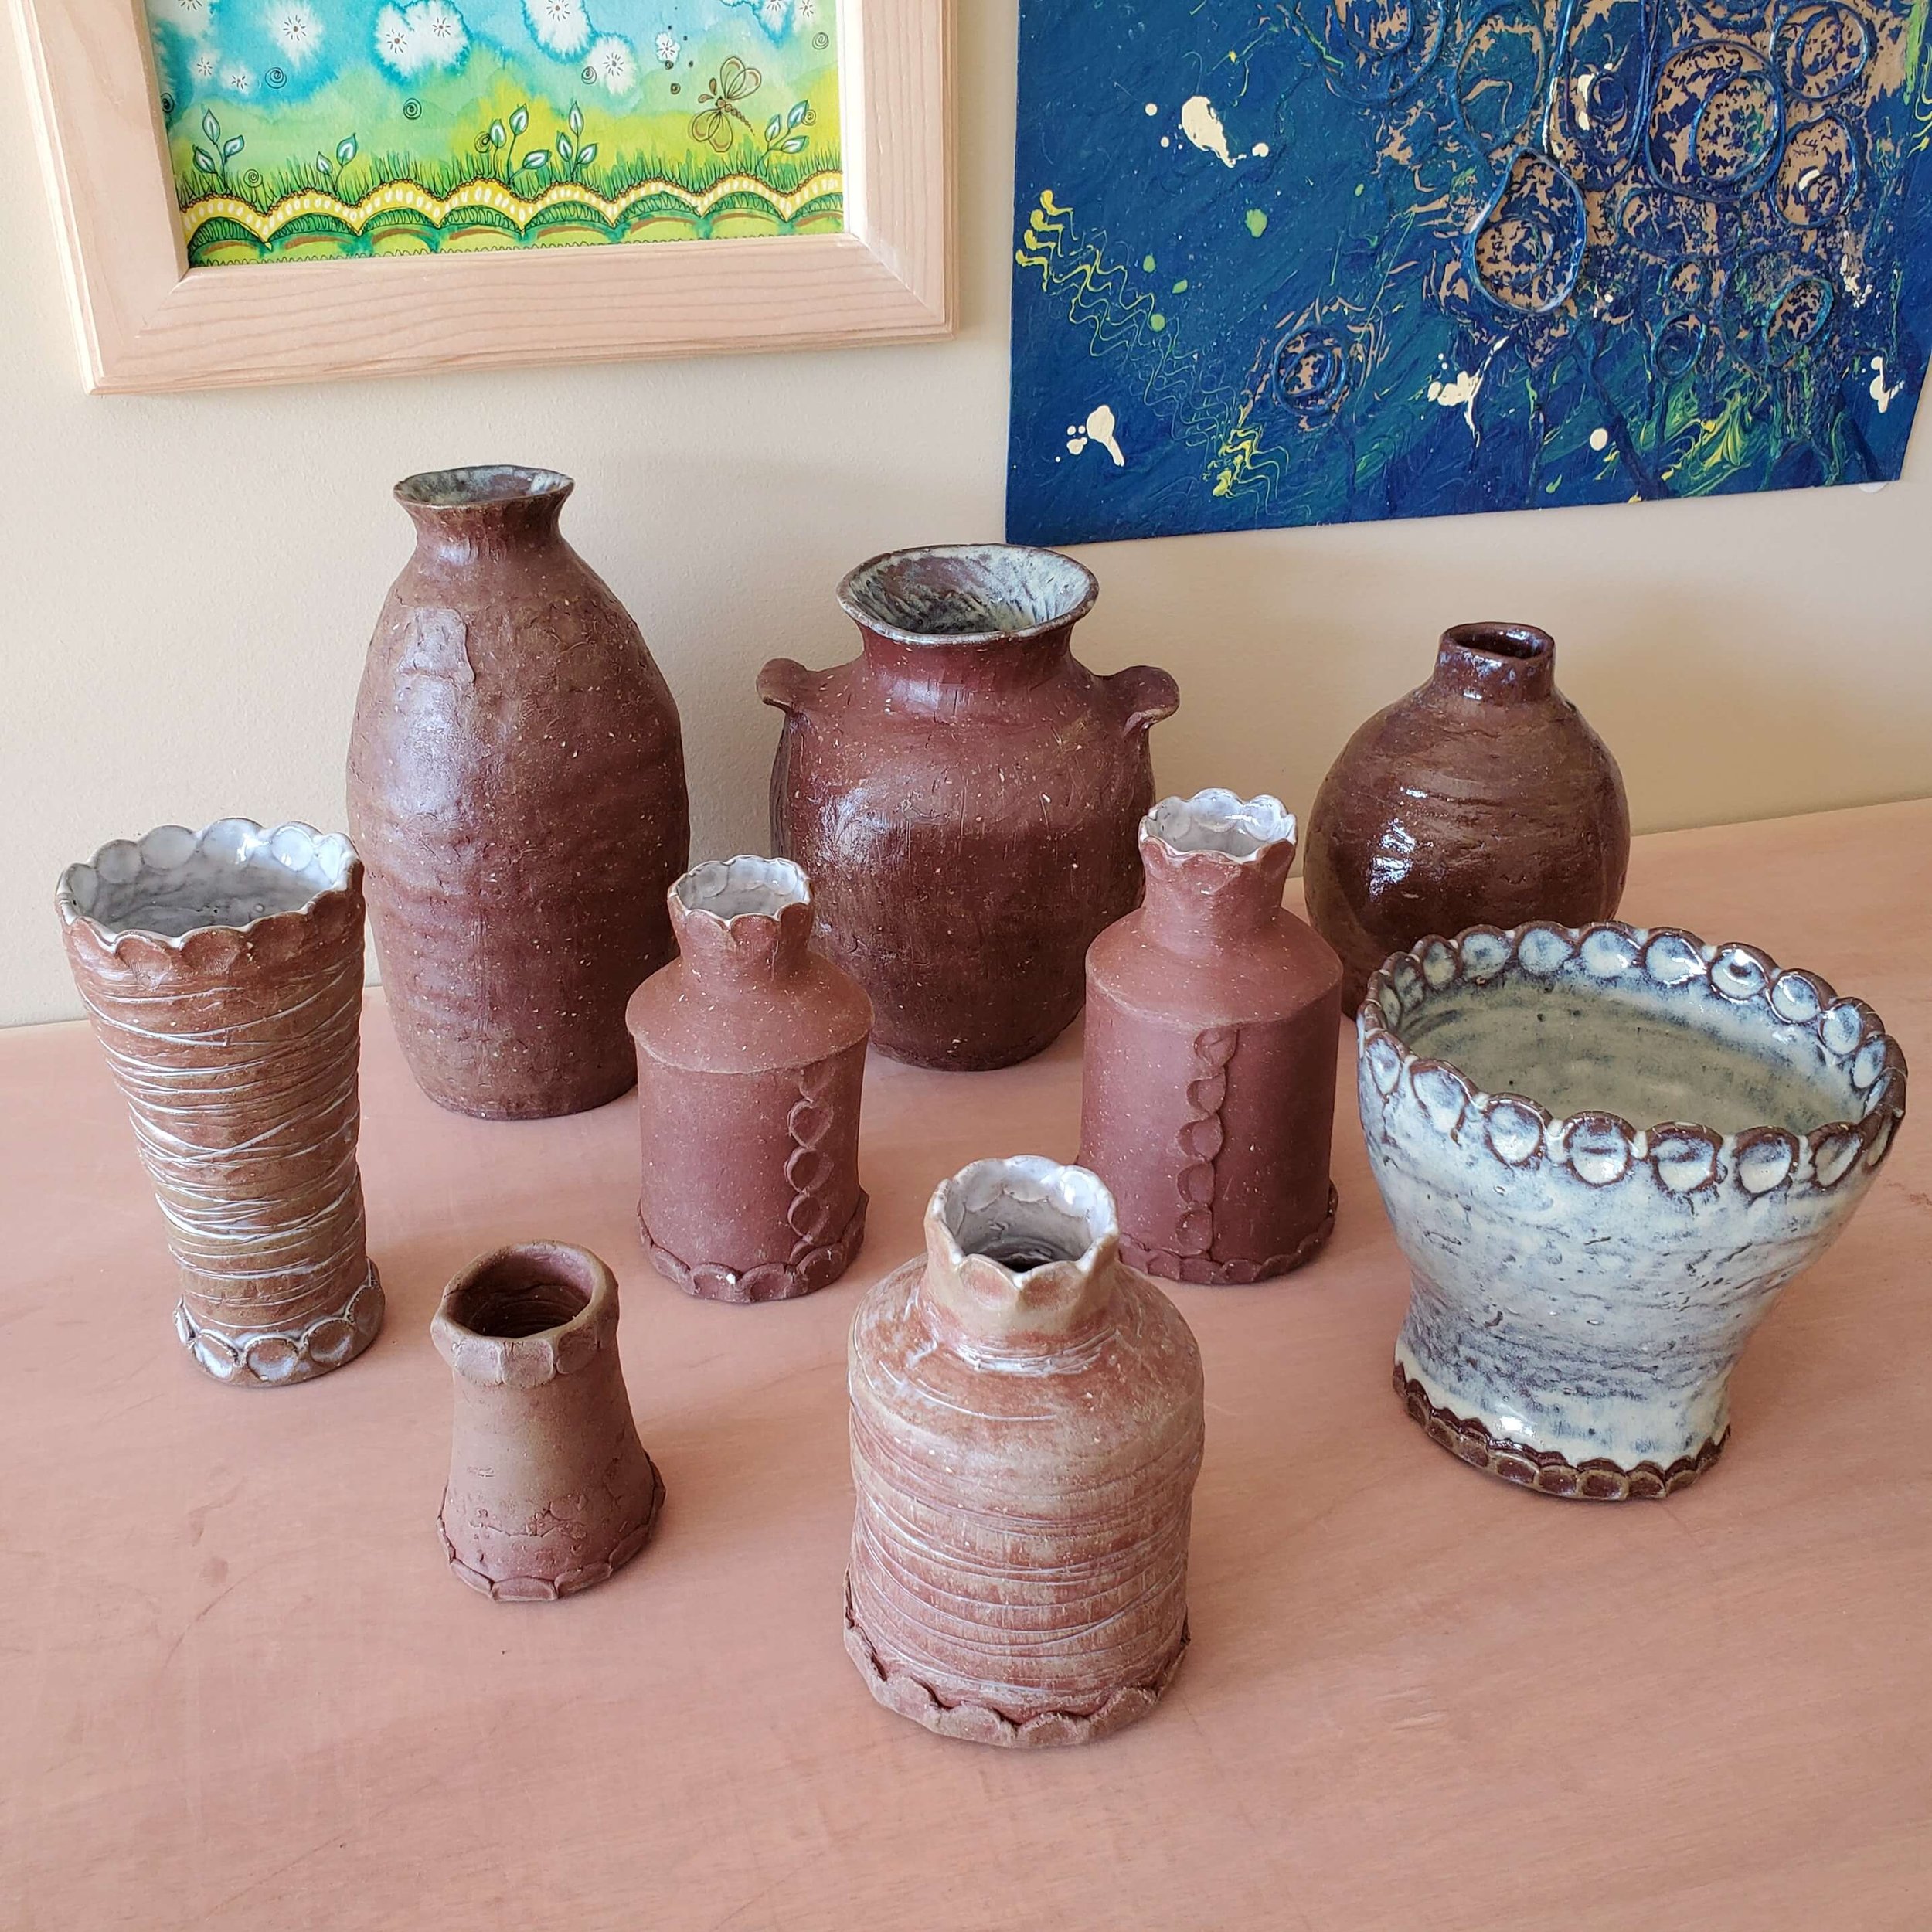
My first batch of Saskatchewan Wild Clay test pieces, in their final, finished state
Growing up as a kid with generations of farmers on both sides of my family, the black dirt of Saskatchewan runs deep in my soul. I worked with my mom and dad in this dirt - I might not be sweeping bins clean, delivering fertilizer, working in the seed cleaning plant or driving the grain truck to unload on the go anymore, but the lessons have followed me throughout my life: working with the seasons of planting, tending, and harvesting; the practice of determination and seeing something through until the finish; and the value of hard work - but also the value of taking time for a visit in the shop over a hot cup of coffee and asking for help when you need it.
I love that I also used these characteristics to work with this clay and bring these mugs to life. My dad brought his mug out to the farm shop and took this picture which perfectly encapsulates this for me. The mug and the glaze are both made with clay that was dug near this place. Saskatchewan will always be my home and it makes me proud to have pottery that represents that so fully.
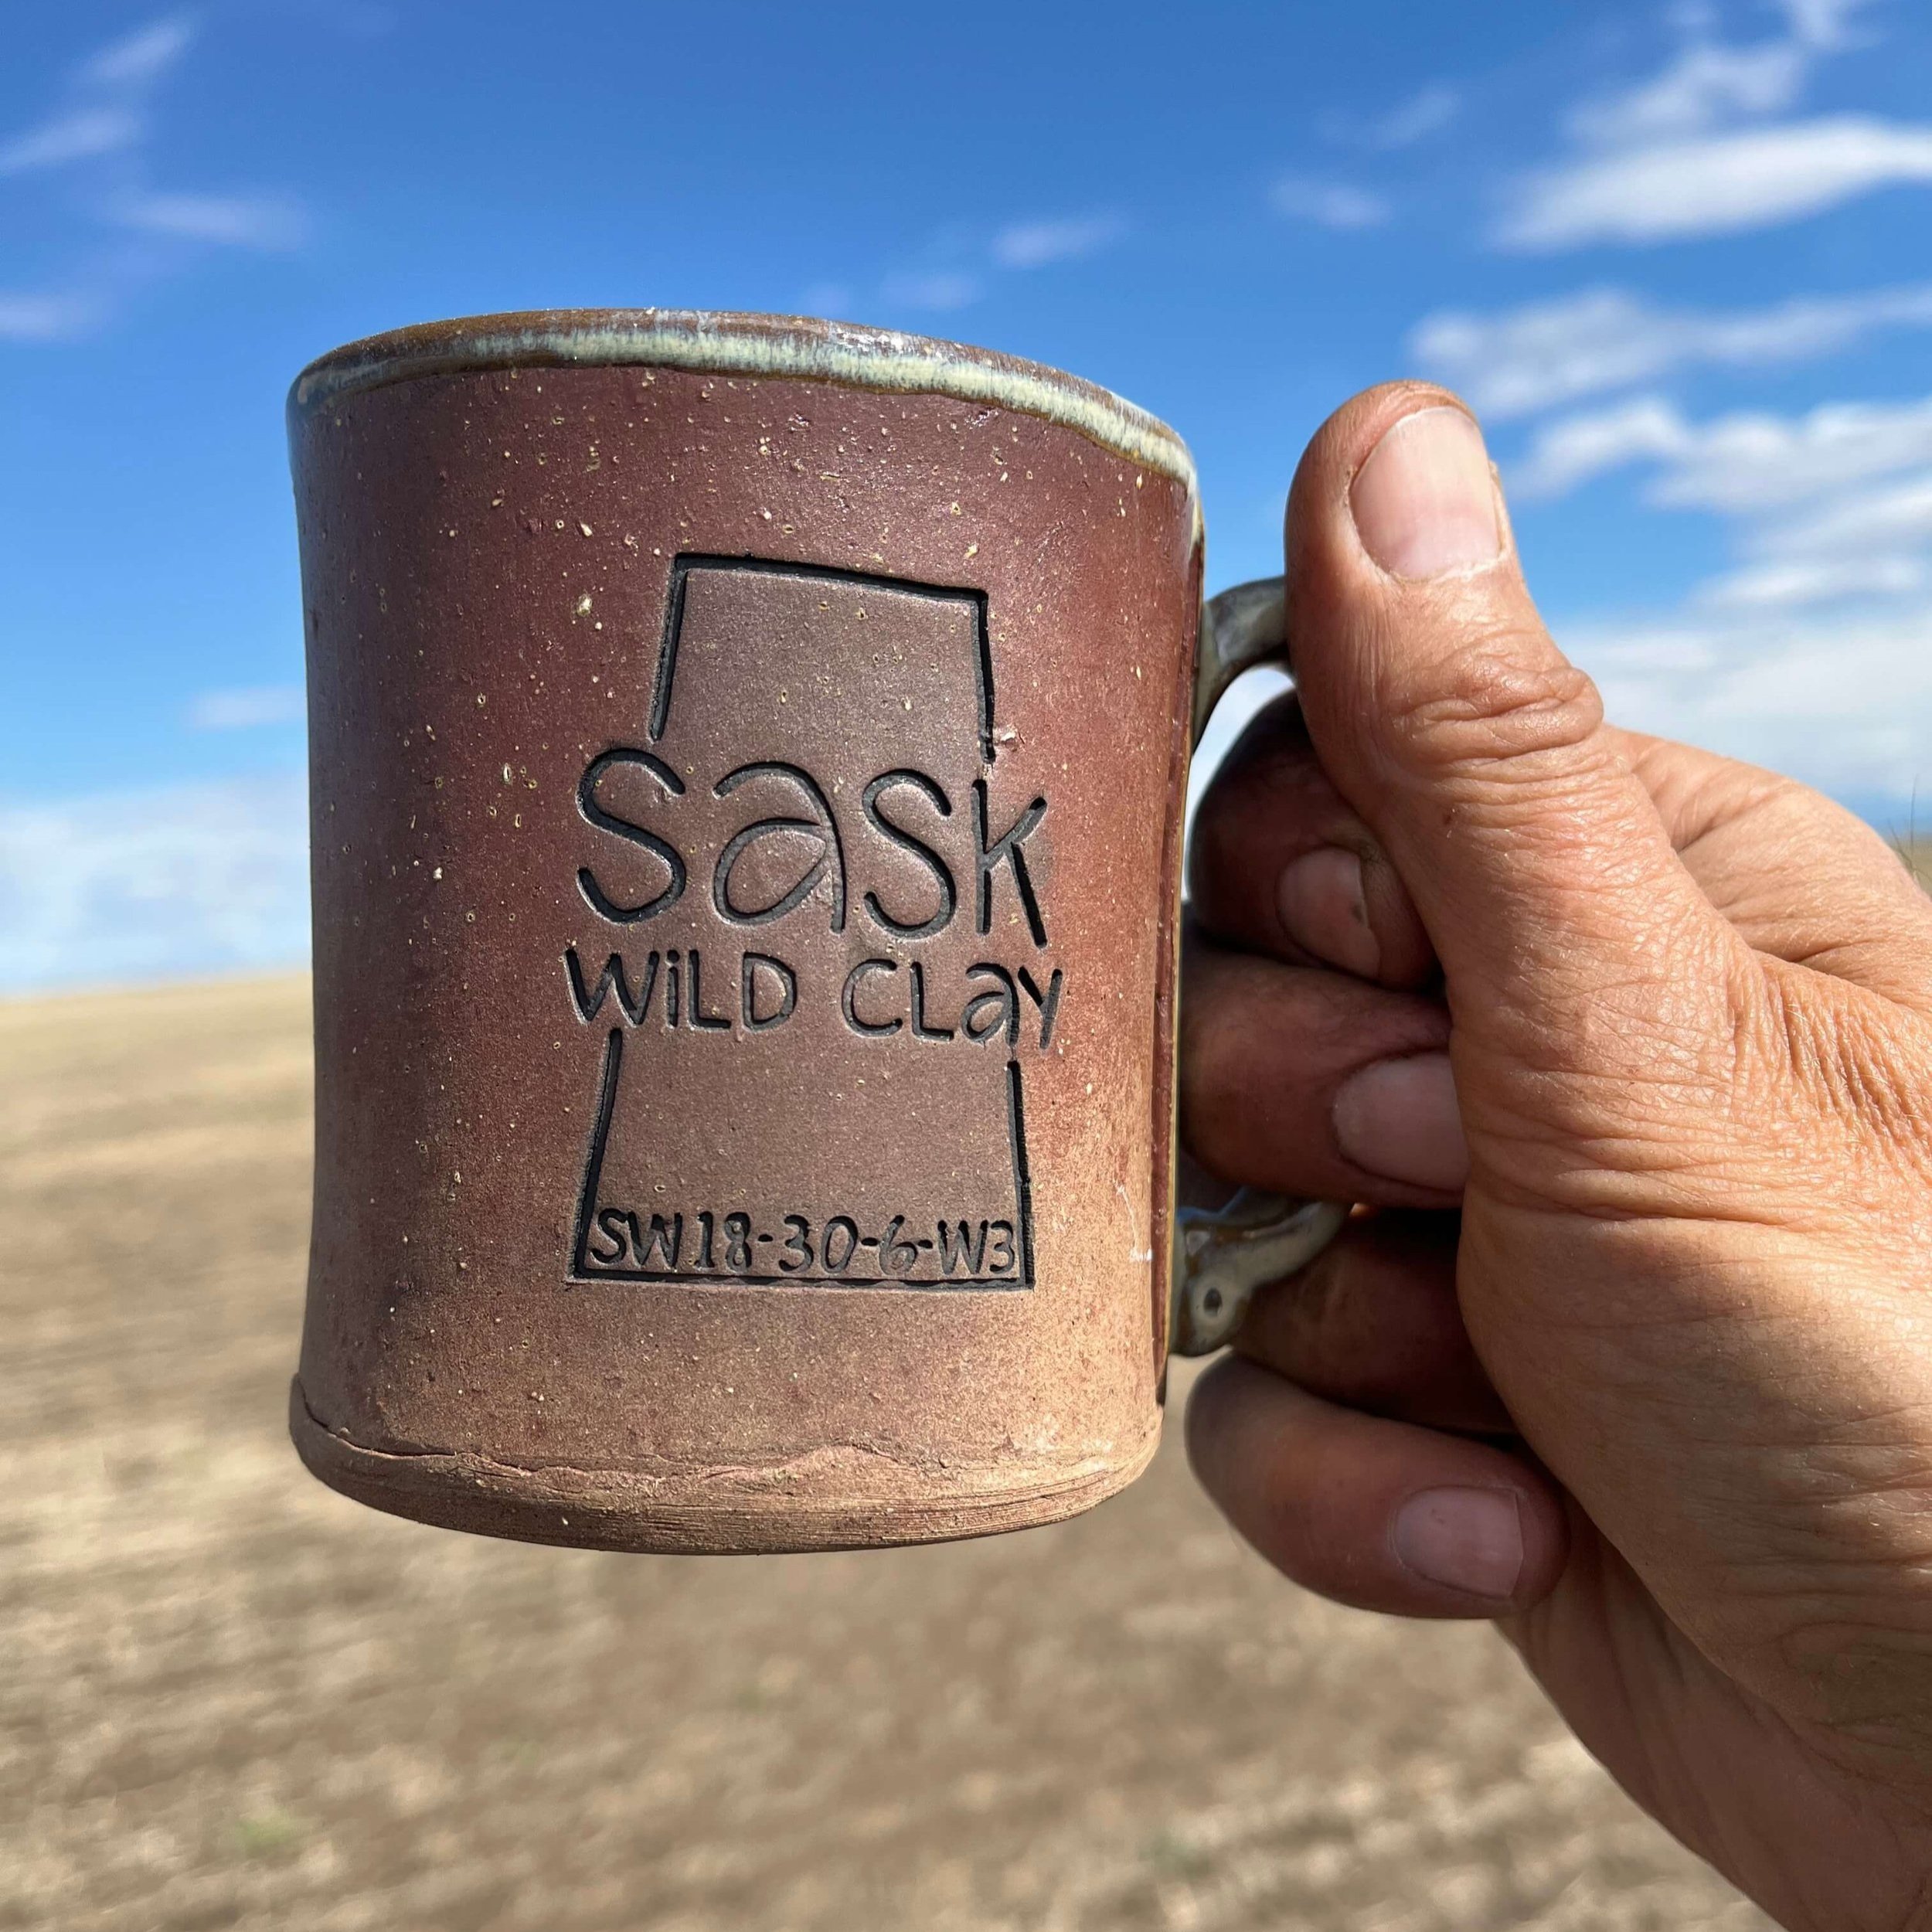
My dad holding the wild clay mug in front of the Saskatchewan landscape that the clay came from. Full circle.
TL;DR Version:
- if you don’t know where to look for clay, check to see if your area has a geological survey map for more information (my research of government documents only showed soil types, rock formations + potash/salt deposits; nothing about clay in my area)
- dig some clay, do a ball + snake test
- make a slurry + sieve if you like
- possibly add other ingredients like ball clay if it cracks (I didn’t do this)
- make test discs for different temperatures and measure the shrinkage + porosity at each temperature
- choose a firing temperature that gets you as close to 0% porosity without slumping or blistering
- make a glaze and test for fit (check for crawling or crazing)
- break the pottery to check how it looks inside (check for carbon coring)
- acid leach test
- freeze/boil test
- drink some coffee out of your lovely wild clay mug!
